Autohotkey 1.1.33.02
Содержание:
- Special Keys
- AutoHotkey автоматизация процессов 1.1.33.00
- Alt-Tab Hotkeys
- Tray Icon
- Основные возможности
- Debugging a Script
- Hotkeys, Hotstrings, and Remapping
- How do I put my hotkeys and hotstrings into effect automatically every time I start my PC?
- I’m having trouble getting my mouse buttons working as hotkeys. Any advice?
- How do I detect the double press of a key or button?
- How can a hotkey or hotstring be made exclusive to certain program(s)? In other words, I want a certain key to act as it normally does except when a specific window is active.
- How can a prefix key be made to perform its native function rather than doing nothing?
- Mouse Wheel Hotkeys
- SendPlay [v1.0.43+]
- Как пользоваться
Special Keys
If your keyboard or mouse has a key not listed above, you might still be able to make it a hotkey by using the following steps:
- Ensure that at least one script is running that is using the keyboard hook. You can tell if a script has the keyboard hook by opening its main window and selecting «View->Key history» from the menu bar.
- Double-click that script’s tray icon to open its main window.
- Press one of the «mystery keys» on your keyboard.
- Select the menu item «View->Key history»
- Scroll down to the bottom of the page. Somewhere near the bottom are the key-down and key-up events for your key. NOTE: Some keys do not generate events and thus will not be visible here. If this is the case, you cannot directly make that particular key a hotkey because your keyboard driver or hardware handles it at a level too low for AutoHotkey to access. For possible solutions, see further below.
- If your key is detectable, make a note of the 3-digit hexadecimal value in the second column of the list (e.g. 159).
- To define this key as a hotkey, follow this example:
SC159:: ; Replace 159 with your key's value.
MsgBox, %A_ThisHotkey% was pressed.
return
Reverse direction: To remap some other key to become a «mystery key», follow this example:
; Replace 159 with the value discovered above. Replace FF (if needed) with the
; key's virtual key, which can be discovered in the first column of the Key History screen.
#c::Send {vkFFsc159} ; See  for more details.
Alternate solutions: If your key or mouse button is not detectable by the Key History screen, one of the following might help:
-
Reconfigure the software that came with your mouse or keyboard (sometimes accessible in the Control Panel or Start Menu) to have the «mystery key» send some other keystroke. Such a keystroke can then be defined as a hotkey in a script. For example, if you configure a mystery key to send Ctrl+F1, you can then indirectly make that key as a hotkey by using in a script.
-
Try AHKHID. You can also try searching the forum for a keywords like , or .
-
The following is a last resort and generally should be attempted only in desperation. This is because the chance of success is low and it may cause unwanted side-effects that are difficult to undo:
Disable or remove any extra software that came with your keyboard or mouse or change its driver to a more standard one such as the one built into the OS. This assumes there is such a driver for your particular keyboard or mouse and that you can live without the features provided by its custom driver and software.
AutoHotkey автоматизация процессов 1.1.33.00
 AutoHotkey — бесплатная программа с открытым исходным кодом для создания макросов и автоматизации, позволяющая упростить повторяющиеся задачи. Она поддерживает собственный язык программирования сценариев (скриптов), приспособленный к лёгкому назначению и переназначению горячих клавиш.Системные требования:Windows XP/Vista/7/8/8.1/10Торрент AutoHotkey автоматизация процессов 1.1.33.00 подробно:Возможности программы:·Автоматизировать почти все процессы лишь нажатием клавиши или кликом мыши. Вы можете писать макросы вручную или с использованием макрорегистраторов.·Задавать «горячие» клавиши для клавиатуры, джойстика и мыши. Практически любая клавиша, кнопка или комбинация может стать «горячей» клавишей.·Использовать автозамену при печатании. Например, аббревиатура «btw» может автоматически заменяться на «by the way».·Создавать пользовательские формы ввода данных, пользовательские интерфейсы и меню. Чтобы получить дальнейшую информацию, см. раздел, посвященный GUI.·Переназначать клавиши и кнопки на клавиатуре, джойстике или мыши.·Передавать сигналы ручного пульта дистанционного управления через клиентский скрипт WinLIRC.·Пользоваться уже существующими скриптами AutoIt v2, а также добавлять в них новые возможности.·Конвертировать любой скрипт в EXE-файл, который затем можно запустить даже на компьютерах, где не установлен AutoHotkey.·Изменение громкости, приглушение звука (mute) и другие настройки любой звуковой карты.·Возможность делать окна прозрачными, устанавливать поверх других окон или изменять их форму.·Использование джойстика или клавиатуры в качестве мыши.·Мониторинг вашей системы. Например, возможность закрывать нежелательные окна при их появлении.·Чтение и изменение содержимого буфера обмена, включая имена файлов, скопированные из окна Explorer.·Запрет или замена собственных «быстрых» клавиш Windows, таких, как Win+E и Win+R.·Уменьшение травм от работы на клавиатуре путем замены комбинации Alt-Tab на другие клавиши, ролик или кнопки мыши.·Настройка меню трея собственными пиктограммами, всплывающими подсказками, пунктами меню и субменю.·Отображение диалоговых окон, подсказок и всплывающих меню, обеспечивающих взаимодействие с пользователем.·Выполнение заданных сценарием операций в ответ на завершение работы системы или конец сеанса.·Определение продолжительности простоя в работе пользователя. Например, запуск объемных задач CPU только в отсутствие пользователя.·Автоматизация игровых действий путем распознавания изображений и цветов пикселов.·Более простое, чем в других языках, чтение, запись и анализ текстовых файлов.·Выполнение операций с файлами с использованием подстановочных символов.·Работа с реестром и INI-файлами.Что нового:·Added #ErrorStdOut Encoding parameter.·Added /ErrorStdOut=Encoding command line switch.·Added #Warn Unreachable (warning mode).·Added #Requires AutoHotkey vVersion (directive).·Added detection of program-terminating SEH exceptions, to display an error dialog.·Fixed a possible bug where Input causes undefined behaviour. ·Fixed WinKill.·Fixed A_WinDir to always return the system Windows directory.·Fixed FileGetShortcut/FileCreateShortcut to return and accept negative icon indices without modification.·Fixed InputBox Locale option to not focus the Cancel button.·Fixed menu bar keyboard shortcuts not working when GUI has no controls.·Fixed LoadPicture to use 256×256 graphic when available in a DLL/EXE.·Fixed DBGp stderr copy mode to not suppress error dialogs.·Fixed ControlGet Line setting ErrorLevel=1 when line is just empty.Fixed Send causing unwanted hotkey buffering.
Скриншоты AutoHotkey автоматизация процессов 1.1.33.00 торрент:
Скачать AutoHotkey автоматизация процессов 1.1.33.00 через торрент:
autohotkey-1_1_33_00.torrent (cкачиваний: 38)
Alt-Tab Hotkeys
Alt-Tab hotkeys simplify the mapping of new key combinations to the system’s Alt-Tab hotkeys, which are used to invoke a menu for switching tasks (activating windows).
Each Alt-Tab hotkey must be either a single key or a combination of two keys, which is typically achieved via the ampersand symbol (&). In the following example, you would hold down the right Alt and press J or K to navigate the alt-tab menu:
RAlt & j::AltTab
RAlt & k::ShiftAltTab
AltTab and ShiftAltTab are two of the special commands that are only recognized when used on the same line as a hotkey. Here is the complete list:
AltTab: If the alt-tab menu is visible, move forward in it. Otherwise, display the menu (only if the hotkey is a combination of two keys; otherwise, it does nothing).
ShiftAltTab: Same as above except move backward in the menu.
AltTabMenu: Show or hide the alt-tab menu.
AltTabAndMenu: If the alt-tab menu is visible, move forward in it. Otherwise, display the menu.
AltTabMenuDismiss: Close the Alt-tab menu.
To illustrate the above, the mouse wheel can be made into an entire substitute for Alt-tab. With the following hotkeys in effect, clicking the middle button displays the menu and turning the wheel navigates through it:
MButton::AltTabMenu
WheelDown::AltTab
WheelUp::ShiftAltTab
To cancel the Alt-Tab menu without activating the selected window, press or send Esc. In the following example, you would hold the left Ctrl and press CapsLock to display the menu and advance forward in it. Then you would release the left Ctrl to activate the selected window, or press the mouse wheel to cancel. Define the window group as shown below before running this example.
LCtrl & CapsLock::AltTab
#IfWinExist ahk_group AltTabWindow  ; Indicates that the alt-tab menu is present on the screen.
*MButton::Send {Blind}{Escape}  ; The * prefix allows it to fire whether or not Alt is held down.
#If
If the script sent (such as to invoke the Alt-Tab menu), it might also be necessary to send as shown in the example further below.
General Remarks
Currently, all special Alt-tab actions must be assigned directly to a hotkey as in the examples above (i.e. they cannot be used as though they were commands). They are not affected by #IfWin or #If.
An alt-tab action may take effect on key-down and/or key-up regardless of whether the keyword is used, and cannot be combined with another action on the same key. For example, using both and is unsupported.
Custom alt-tab actions can also be created via hotkeys. As the identity of the alt-tab menu differs between OS versions, it may be helpful to use a window group as shown below. For the examples above and below which use , this window group is expected to be defined in the . Alternatively, can be replaced with the appropriate for your system.
GroupAdd AltTabWindow, ahk_class MultitaskingViewFrame  ; Windows 10
GroupAdd AltTabWindow, ahk_class TaskSwitcherWnd  ; Windows Vista, 7, 8.1
GroupAdd AltTabWindow, ahk_class #32771  ; Older, or with classic alt-tab enabled
In the following example, you would press F1 to display the menu and advance forward in it. Then you would press F2 to activate the selected window, or press Esc to cancel:
*F1::Send {Alt down}{tab} ; Asterisk is required in this case.
!F2::Send {Alt up}  ; Release the Alt key, which activates the selected window.
#IfWinExist ahk_group AltTabWindow
~*Esc::Send {Alt up}  ; When the menu is cancelled, release the Alt key automatically.
;*Esc::Send {Esc}{Alt up}  ; Without tilde (~), Escape would need to be sent.
#If
Tray Icon
By default, each script adds its own icon to the taskbar notification area (commonly known as the tray).
The tray icon usually looks like this (but the color or letter changes when the script is paused or suspended):
Right-click the tray icon to show the tray menu, which has the following options by default:
- Open — Open the script’s .
- Help — Open the AutoHotkey offline help file.
- Window Spy — Displays various information about a window.
- Reload This Script — See Reload.
- Edit This Script — See Edit.
- Suspend Hotkeys — Suspend or unsuspend hotkeys.
- Pause Script — Pause or unpause the script.
- Exit — Exit the script.
By default, double-clicking the tray icon shows the script’s .
The Menu command can be used to customise the tray icon and menu.
The #NoTrayIcon directive can be used to hide the tray icon.
Основные возможности
- автоматизация различных действий путем эмуляции нажатия определенных клавиш на мыши и клавиатуре;
- написание или запись макросов с использованием рекордера;
- назначение горячих клавиш;
- быстрая расшифровка аббревиатур;
- создание произвольных форм для ввода информации;
- изменение назначения любых клавиш;
- обработка сигналов, переданных внешними устройствами управления;
- преобразование скриптов;
- управление громкостью и другими настройками звуковых карт;
- выполнение мониторинга системы;
- изменение содержимого в буфере обмена;
- отображение на экране надписей и диалоговых окон;
- автоматизация действий в играх;
- любые операции с текстовыми файлами и др.
Плюсы и минусы
Плюсы:
- автоматический запуск практически любых операций на ПК;
- встроенный скриптовый язык;
- переназначение любых клавиш;
- поддержка разных устройств для вывода.
Минусы:
некоторые сложности в освоении.
Похожие программы
Auto-Clicker. Программа для запоминания и последующего воспроизведения всех действий компьютерной мыши. Записанные действия в ней можно повторять произвольное количество раз, настраивая скорость их воспроизведения.
Macro Recorder. Приложение, которое может автоматизировать все рутинные процессы на компьютере. С его помощью можно создавать макросы, которые будут самостоятельно запускать необходимые программы, выполнять клики мышкой, вводить текст и т. д.
Как пользоваться приложением
Для того чтобы с помощью программы назначить автоматическое выполнение какого-либо действия, нужно создать скрипт. Он представляет собой всплывающее окно с пометкой «Я рогалег». С этой целью используем команду MsgBox, которую можно вызвать любым текстом. Надпись и команду необходимо вписать в любой текстовый редактор, так как сама программа как такового отдельного окна не имеет. Далее сохраняем файл, обязательно указав для него расширение «ahk». Скрипт будет выполнен при нажатии на него двойным щелчком.
Выполнение скрипта
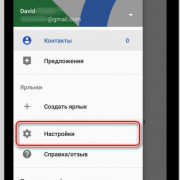
При запуске скрипта появится значок «Autohotkey». Нажав на него правой кнопкой, вы сможете выбрать необходимые команды.
Выбор команд
Код, который должен автоматически выполняться при запуске скрипта, помещается вверху файла. Идентификаторы нужно указывать для горячих клавиш.
Рассмотрим, как это действует, на примере назначения автоматического запуска блокнота Notepad++ при нажатии определенных клавиш.
Для начала набираем «#n:: Run notepad++» и сохраняем файл. Дважды щелкаем по нему и набираем команду «Win+n». В области уведомления появится значок, а программа будет запущена при нажатии указанной комбинации клавиш.
В команде значок «#n» определяет кнопки, «::» — разделяет обозначения самих клавиш от команд. Остальные базовые кнопки обозначаются таким образом:
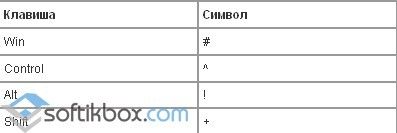 Обозначения кнопок
AutoHotkey поможет легко и быстро выполнять любые операции и действия, которые вам приходится часто производить на своем ПК.
Debugging a Script
Commands such as ListVars and Pause can help you debug a script. For example, the following two lines, when temporarily inserted at carefully chosen positions, create «break points» in the script:
ListVars
Pause
When the script encounters these two lines, it will display the current contents of all variables for your inspection. When you’re ready to resume, un-pause the script via the File or Tray menu. The script will then continue until reaching the next «break point» (if any).
It is generally best to insert these «break points» at positions where the active window does not matter to the script, such as immediately before a WinActivate command. This allows the script to properly resume operation when you un-pause it.
The following commands are also useful for debugging: ListLines, KeyHistory, and OutputDebug.
Some common errors, such as typos and missing «global» declarations, can be detected by enabling warnings.
Interactive Debugging
Interactive debugging is possible with a supported DBGp client. Typically the following actions are possible:
- Set and remove breakpoints on lines — pause execution when a breakpoint is reached.
- Step through code line by line — step into, over or out of functions and subroutines.
- Inspect all variables or a specific variable.
- View the stack of running subroutines and functions.
Note that this functionality is disabled for compiled scripts.
To enable interactive debugging, first launch a supported debugger client then launch the script with the /Debug command-line switch.
AutoHotkey.exe /Debug=SERVER:PORT ...
SERVER and PORT may be omitted. For example, the following are equivalent:
AutoHotkey /Debug "myscript.ahk"
AutoHotkey /Debug=localhost:9000 "myscript.ahk"
: To attach the debugger to a script which is already running, send it a message as shown below:
ScriptPath := "" ; SET THIS TO THE FULL PATH OF THE SCRIPT
DetectHiddenWindows On
if WinExist(ScriptPath " ahk_class AutoHotkey")
    ; Optional parameters:
    ;   wParam  = the IPv4 address of the debugger client, as a 32-bit integer.
    ;   lParam  = the port which the debugger client is listening on.
    PostMessage DllCall("RegisterWindowMessage", "str", "AHK_ATTACH_DEBUGGER")
Once the debugger client is connected, it may detach without terminating the script by sending the «detach» DBGp command.
Hotkeys, Hotstrings, and Remapping
How do I put my hotkeys and hotstrings into effect automatically every time I start my PC?
There are several ways to make a script (or any program) launch automatically every time you start your PC. The easiest is to place a shortcut to the script in the Startup folder:
- Find the script file, select it, and press Ctrl+C.
- Press Win+R to open the Run dialog, then enter and click OK or Enter. This will open the Startup folder for the current user. To instead open the folder for all users, enter (however, in that case you must be an administrator to proceed).
- Right click inside the window, and click «Paste Shortcut». The shortcut to the script should now be in the Startup folder.
The left and right mouse buttons should be assignable normally (for example, is the Win+LeftButton hotkey). Similarly, the middle button and the turning of the mouse wheel should be assignable normally except on mice whose drivers directly control those buttons.
The fourth button (XButton1) and the fifth button (XButton2) might be assignable if your mouse driver allows their clicks to be seen by the system. If they cannot be seen — or if your mouse has more than five buttons that you want to use — you can try configuring the software that came with the mouse (sometimes accessible in the Control Panel or Start Menu) to send a keystroke whenever you press one of these buttons. Such a keystroke can then be defined as a hotkey in a script. For example, if you configure the fourth button to send Ctrl+F1, you can then indirectly configure that button as a hotkey by using in a script.
If you have a five-button mouse whose fourth and fifth buttons cannot be seen, you can try changing your mouse driver to the default driver included with the OS. This assumes there is such a driver for your particular mouse and that you can live without the features provided by your mouse’s custom software.
Use as follows:
~Ctrl::
    if (A_ThisHotkey = A_PriorHotkey && A_TimeSincePriorHotkey < 200)
        MsgBox double-press
return
How can a hotkey or hotstring be made exclusive to certain program(s)? In other words, I want a certain key to act as it normally does except when a specific window is active.
The preferred method is #IfWinActive. For example:
#IfWinActive, ahk_class Notepad
^a::MsgBox You pressed Control-A while Notepad is active.
How can a prefix key be made to perform its native function rather than doing nothing?
Consider the following example, which makes Numpad0 into a prefix key:
Numpad0 & Numpad1::MsgBox, You pressed Numpad1 while holding down Numpad0.
Now, to make Numpad0 send a real Numpad0 keystroke whenever it wasn’t used to launch a hotkey such as the above, add the following hotkey:
$Numpad0::Send, {Numpad0}
The $ prefix is needed to prevent a warning dialog about an infinite loop (since the hotkey «sends itself»). In addition, the above action occurs at the time the key is released.
Mouse Wheel Hotkeys
Hotkeys that fire upon turning the mouse wheel are supported via the key names WheelDown and WheelUp. Here are some examples of mouse wheel hotkeys:
MButton & WheelDown::MsgBox You turned the mouse wheel down while holding down the middle button.
^!WheelUp::MsgBox You rotated the wheel up while holding down Control+Alt.
: WheelLeft and WheelRight are also supported, but have no effect on operating systems older than Windows Vista. Some mice have a single wheel which can be scrolled up and down or tilted left and right. Generally in those cases, WheelLeft or WheelRight signals are sent repeatedly while the wheel is held to one side, to simulate continuous scrolling. This typically causes the hotkeys to execute repeatedly.
: The built-in variable A_EventInfo contains the amount by which the wheel was turned, which is typically 1. However, A_EventInfo can be greater or less than 1 under the following circumstances:
- If the mouse hardware reports distances of less than one notch, A_EventInfo may contain 0;
- If the wheel is being turned quickly (depending on type of mouse), A_EventInfo may be greater than 1. A hotkey like the following can help analyze your mouse: .
Some of the most useful hotkeys for the mouse wheel involve alternate modes of scrolling a window’s text. For example, the following pair of hotkeys scrolls horizontally instead of vertically when you turn the wheel while holding down the left Ctrl:
~LControl & WheelUp::  ; Scroll left.
ControlGetFocus, fcontrol, A
Loop 2  ; <-- Increase this value to scroll faster.
    SendMessage, 0x0114, 0, 0, %fcontrol%, A  ; 0x0114 is WM_HSCROLL and the 0 after it is SB_LINELEFT.
return

~LControl & WheelDown::  ; Scroll right.
ControlGetFocus, fcontrol, A
Loop 2  ; <-- Increase this value to scroll faster.
    SendMessage, 0x0114, 1, 0, %fcontrol%, A  ; 0x0114 is WM_HSCROLL and the 1 after it is SB_LINERIGHT.
return
Finally, since mouse wheel hotkeys generate only down-events (never up-events), they cannot be used as .
SendPlay [v1.0.43+]
Warning: SendPlay may have no effect at all if UAC is enabled, even if the script is running as an administrator. For more information, refer to the .
SendPlay’s biggest advantage is its ability to «play back» keystrokes and mouse clicks in a broader variety of games than the other modes. For example, a particular game may accept only when they have the .
Of the three sending modes, SendPlay is the most unusual because it does not simulate keystrokes and mouse clicks per se. Instead, it creates a series of events (messages) that flow directly to the active window (similar to ControlSend, but at a lower level). Consequently, SendPlay does not trigger hotkeys or hotstrings.
Like , SendPlay’s keystrokes do not get interspersed with keystrokes typed by the user. Thus, if the user happens to type something during a SendPlay, those keystrokes are postponed until afterward.
Although SendPlay is considerably slower than SendInput, it is usually faster than the traditional mode (even when KeyDelay is -1).
Both Win (LWin and RWin) are automatically blocked during a SendPlay if the keyboard hook is installed. This prevents the Start Menu from appearing if the user accidentally presses Win during the send. By contrast, keys other than LWin and RWin do not need to be blocked because the operating system automatically postpones them until after the SendPlay (via buffering).
SendPlay does not use the standard settings of SetKeyDelay and SetMouseDelay. Instead, it defaults to no delay at all, which can be changed as shown in the following examples:
SetKeyDelay, 0, 10, Play  ; Note that both 0 and -1 are the same in SendPlay mode.
SetMouseDelay, 10, Play
SendPlay is unable to turn on or off CapsLock, NumLock, or ScrollLock. Similarly, it is unable to change a key’s state as seen by unless the keystrokes are sent to one of the script’s own windows. Even then, any changes to the left/right modifier keys (e.g. RControl) can be detected only via their neutral counterparts (e.g. Control). Also, SendPlay has other limitations described on the .
Unlike and , the user may interrupt a SendPlay by pressing Ctrl+Alt+Del or Ctrl+Esc. When this happens, the remaining keystrokes are not sent but the script continues executing as though the SendPlay had completed normally.
Although SendPlay can send LWin and RWin events, they are sent directly to the active window rather than performing their native operating system function. To work around this, use . For example, would show the Start Menu’s Run dialog.
Как пользоваться
Дальше давайте переходить к практике и разбираться, где бесплатно скачать последнюю версию данного предложения, как его установить, а также как написать свой первый скрипт при помощи AutoHotkey.
Загрузка и установка
Начинать мы будем именно с установки. Тем более, что как таковой, ее здесь нет. Данная программа работает сразу после запуска. Рассмотрим, как его осуществить:
- Сначала мы загружаем архив с приложением, прокрутив страничку ниже и воспользовавшись кнопкой для его скачивания. Распаковываем исполняемый файл и запускаем его двойным левым кликом.
- Теперь нам необходимо предоставить доступ к администраторским полномочиям. В противном случае приложение не сможет корректно работать.
- На этом все. Наша программа установленная и теперь можно переходить непосредственно к работе с ней.
Инструкция по работе
Теперь давайте в общих чертах разберемся, как пользоваться данным приложением. Первое, что следует знать, это скриптовый язык программирования, который тут используется. Без него ни одного макроса написать, к сожалению, не получится. А сам алгоритм использования программы выглядит следующим образом:
- Вы пишите макрос, которым должна руководствоваться в своей работе AutoHotkey.
- Далее при помощи программы открываем данный скрипт и, при необходимости, преобразуем его в EXE-файл.
- Дальше мы можем использовать файл где угодно.
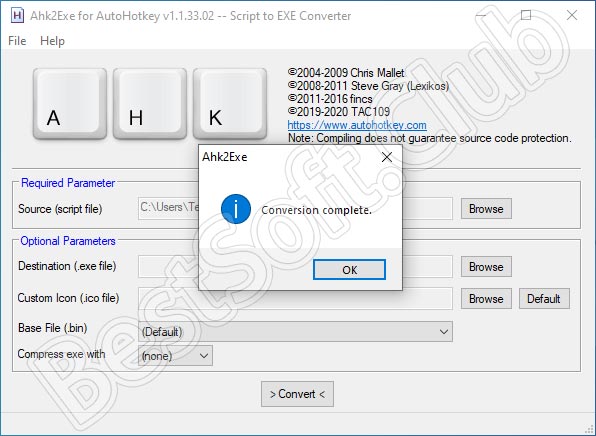
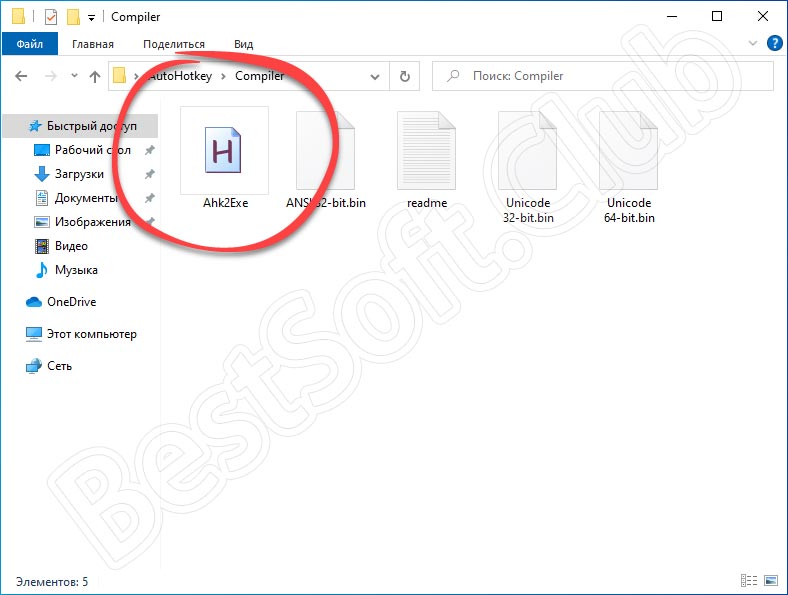
Вот так выглядит сам скрипт, а также созданный с его помощью исполняемый файл.