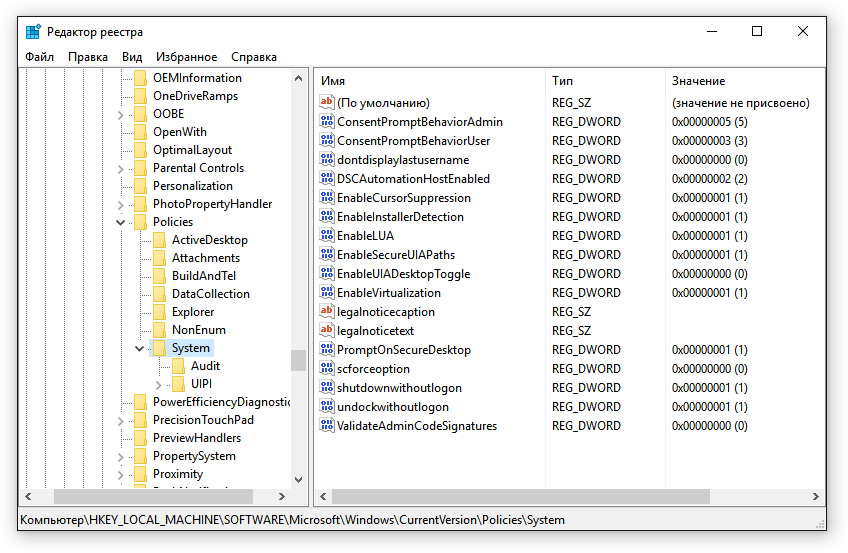
Устранение неполадок буферизации plex
Содержание:
- Установка PlexConnect на ПК
- What is Plex Media Server?
- Plex Subtitles
- Preparation
- 1. Организуйте агентов Plex
- 4. Оптимизируйте свои видео Plex.
- Server Installation
- Subtitles
- Создание медиатеки
- Plex Media Server — Установка
- 1. Setting Up and Installing the Plex Media Server
- Intro to Plex
- Трюк второй: использование приложений DLNA в качестве запасного варианта
- Sharing Plex Content
- Программное обеспечение
- Step by Step
- История
- Есть ли у Plex Live TV какие-либо ограничения?
- Main
- Accessing or Restricting the Content
- M3U playlist IPTV Player for Plex
- Basic Info About Live TV on Plex
Установка PlexConnect на ПК
PlexConnect (https://github.com/iBaa/PlexConnect/wiki/Install-Guide)–это специальная программа, которая перехватывает запрос на DNS сервер с Apple TV, и подставляет свои данные в ответе Apple TV. В результате чего при нажатии кнопки Трейлеры (Trellers) на Apple TV,
происходит переход на портал Plex.
Причем данный результат достигается без jailbreak устройства Apple TV.
Для установки, плагина PlexConnect, предварительно требуется установить интерпретатор языка Python. Для это установите python-2.7.5.amd64.exe.
После установки python-2.7.5.amd64.exe скопируйте папку Plex_Connect (из архива) на диск C.
В папке Plex Connect главным исполняющим файлом является «C:Plex_ConnectPlexConnect.py» создайте ярлык для данного файла на рабочем столе. Только после запуска PlexConnect.py начнется работа PlexConnect плагина.
Скриншот корректно запущенного PlexConnect’a.:
Вслучае если необходимо скрыть запуск и работу скрипта PlexConnect.py, на ПК с Plex сервером. Создайте текстовый файл PlexConnectStart.vbs с содержимым:
Dim oShell
Set oShell = WScript.CreateObject («WSCript.shell»)
oShell.run «C:Plex_ConnectPlexConnect.py», 2
Set oShell = Nothing
И добавьте его в автозапуск Windows.
Теперь скрипт будет запускаться в свернутом режиме.
Далее приступим к установке сертификата PlexConnect на устройство Apple TV.
What is Plex Media Server?
Plex Media Server is an all-in-one media software system that stores and transmits content from a central location to all your favorite devices.
Plex works as a “hub” for all your favorite media including Movies, TV Shows, Photos, Music and more. You can then install the Plex app onto any device to access this content wherever you are.
Users oftentimes install Plex on their favorite streaming device, including the Amazon Firestick, to stream downloaded movies from their home server.
However, Plex supports tons of devices including Fire TV, Android, Roku, Apple TV, Chromecast, and much more.
Plex is an all-encompassing media manager and might be the last streaming app you’ll need.
It is also a great tool for storing home videos, photos, and other personal items without taking up space on each specific device.
Plex gives you an easy way to access all of your stored media no matter your location.
A new addition to the Plex arsenal is its streaming app that is included with your free Plex subscription.
This app has tons of Movies and TV Shows that are free to stream on any device that has the Plex app.
While the main characteristics of Plex are provided with free registration, Plex also has a premium paid service available.
By purchasing Plex Pass, you will have access to even more features. This includes DVR abilities to record OTA content and full mobile app compatibility.
To get started with Plex you will first need a home media server to store all of your files. Many find that their home PC or desktop computer works perfectly for this purpose.
Plex Subtitles
For those who have trouble hearing or simply enjoy closed caption when streaming, Plex also has the ability to enable subtitles.
Prior to integrating subtitles with your content, you must have an OpenSubtitles account. OpenSubtitles works with Plex and tons of other apps as shown in our Subtitle guide below:
The process for Plex, however, is a little different than other streaming apps. Follow the guide below to enable subtitles within Plex:
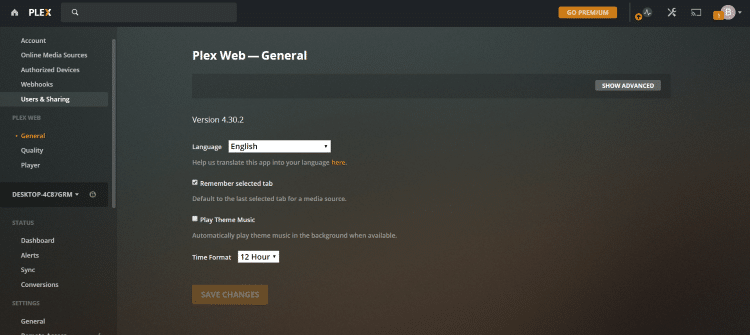
1. Launch Your Plex Server and click Settings (tool icon) in the upper right-hand corner
2. Select Agents and choose Plex Movie
3. Click the Gear icon next to OpenSubtitles.org
4. Enter your OpenSubtitles login credentials, choose your language preferences, and click Save
5. Check the box next to OpenSubtitles
6. Return to the homepage of your Server and click the options button next to the content you want subtitles added and select Refresh All Metadata
7. When prompted, click Refresh
8. Wait for metadata to refresh and that’s it! You can now enjoy Subtitles on your synced content from any device.
To activate subtitles on your Plex Client app, simply play your chosen content and enable within settings of the movie/tv show.
Enjoy!
Preparation
Before You Begin
Before you begin installing Plex Media Server, it’s strongly recommended that you check that your media collection has been named and organized in a way that Plex will understand. If not, you may notice content isn’t recognized, is mis-matched, or not found at all.
You may already be naming and organizing your media files in a way suitable for Plex. Here are the important things:
- Movies are gathered together in a “Movies” type folder, TV Shows in a “TV Shows” type folder, etc.
-
Movies are named as follows:
-
TV Show episodes are named with the season and episode:
-
TV Show episodes are stored in their own folder as follows:
- For TV shows, the folder structure can be very important. Make sure you have show folders that contain season folders that contain the episodes
Related Page: Your Media
Tip!: It’s important to understand that Plex Media Server does not have its own graphical user interface. When you run the server on your computer, NAS, or other device, you won’t see a window open with a “server UI” or similar. Instead, you use the Plex Web App to manage your server.
Download the Installer
The Plex Media Server can be downloaded for free from the Plex Downloads page. There are many platforms available:
- Windows
- macOS
- Linux
- Compatible NAS devices
From the Downloads page, choose the platform or device you need, and download the installer.
Related Page: Plex DownloadsRelated Page: NAS Devices
Get a Plex (Player) App
While you’re on the Downloads page, you may wish to download a player app as well. The server includes the browser-based Plex Web App, but you’ll probably want to download an app for other devices. There are many available:
- Windows/macOS Desktop PCs: Plex for Windows, Plex for macOS, or Plex Media Player (primarily intended for HTPC usage)
- Mobile Devices: Android, iOS
- Connected Devices: Amazon Fire TV, Apple TV, Android TV, Roku, Smart TVs, game consoles, and more
Related Page: Player Apps and Platforms
1. Организуйте агентов Plex
Plex может автоматически вставлять метаданные для вашего контента. Хотя вам нужно очень точно отформатировать медиафайлы Plex, чтобы это работало, это стоит сделать.
Конечно, Plex может добавлять постеры к фильмам и названия сериалов, но метаданные идут гораздо глубже. Он будет знать, какие актеры были в шоу, на каком телеканале транслировалось шоу, кто поставил каждый фильм и что различные критики на известных сайтах обзора думали о содержании. После того как вы добавили метаданные, вы даже можете использовать их для поиска связанных шоу, других фильмов, в которых снимались некоторые актеры, и так далее.
Но ничего из этого не сработает, если вы неправильно настроите своих агентов. Вам необходимо убедиться, что Local Media настроен для других источников метаданных. Если нет, Plex будет использовать существующие локальные метаданные в файле в качестве основного источника. Во многих случаях эти метаданные будут неверными.
Чтобы изменить порядок, перейдите в « Настройки»> «Настройки»> «Агенты» . Используя вкладки в верхней части экрана, выберите «Фильмы»> «База данных фильмов» . Перетащите локальные медиаресурсы (фильмы) под базу данных фильмов . Затем перейдите в « Программы»> «TheTVDB» и переместите « Local Media Assets (TV)» в « TheTVDB» .
4. Оптимизируйте свои видео Plex.
Функцию оптимизации лучше всего рассматривать как «предварительный транскодер». Это позволяет вам выбирать определенные видео и конвертировать их в другой формат.
Например, если вы знаете, что хотите посмотреть «Историю игрушек», «Красавица и чудовище» и «Бэтмена» на своем iPad во время путешествия на следующей неделе, вы можете заранее оптимизировать видеофайлы. Это означает, что они будут немедленно готовы к игре на выбранном вами устройстве. Дальнейшего перекодирования не потребуется.
Оптимизация мультимедиа полезна, даже если вы знаете, что многие люди будут одновременно смотреть видео удаленно, поскольку это снизит нагрузку на ваш процессор.
Вы можете оптимизировать отдельное шоу, серию или даже всю библиотеку. Для начала перейдите к контенту, который хотите отредактировать, нажмите на три горизонтальные точки и выберите « Оптимизировать» .
В новом окне вы можете выбрать, хотите ли вы оптимизировать определенное количество видео или только непросмотренные видео
Что еще более важно, вы можете установить качество оптимизации. Вы можете выбрать Оптимизировать для мобильных устройств , Оптимизировать для ТВ , Исходное качество или Пользовательское
Параметр Custom позволяет указать конкретное устройство, разрешение и битрейт.
Если вы настроили длинный список элементов для оптимизации, вы можете управлять очередью, выбрав « Настройки»> «Статус»> «Конверсия» . Вы можете управлять уже оптимизированными файлами в разделе «Настройки»> «Управление»> «Оптимизированные версии» .
Server Installation
The server is available for many different platforms. Installation is always via an installation package and follows the platform’s usual installation method. For NAS devices, you should follow the manufacturer’s add-on installation procedure.
Note: You’ll need to be sure to run your Plex Media Server on a filesystem that allows symlinks/hardlinks. For the vast majority of users, this isn’t an issue. If you’re running on an unusual filesystem (such as a drive pool or similar), then you should check for support.
Windows
- Download the Windows Installer .exe file
- Run the installer
- Follow the usual installation method
- At the final screen, click the Launch button. If you don’t select this, launch the Server from the Start button
The Plex Media Server will launch and display an icon to the System Tray (bottom right of the screen) To setup the Plex Media Server, choose Open Plex… from the Plex icon in the system tray.
macOS
- Download the Plex Media Server .zip
- Unzip the file
- Drag the Plex Media Server app to the Applications folder
- Launch the Plex Media Server from the Applications folder
To setup Plex Media Server from the server computer, launch the Open Plex… from the “>” icon in your Mac’s menubar.
Linux
Below, you’ll find information on installing Plex Media Server for our supported Linux distributions. Once installation is complete, you can also choose to enable updating via repository.
Related Page:
Ubuntu
- Download the .deb package
- run (replacing the last filename with the name of the package you downloaded)
To setup Plex Media Server, on the same machine you installed the server on, open a browser window, and go to .
Note: The Plex Media Server runs as the user “plex” by default. The plex user must have read and execute permissions to your media directories and files! For more details on how to do this, see the .
Fedora/CentOS
- Download the .rpm package
- run (replacing the last filename with the name of the package you downloaded)
To setup the Server, on the same machine you installed the Server on, open a browser window and go to .
Note: The Plex Media Server runs as the user “plex” by default. The plex user must have read and execute permissions to your media directories and files! For more details on how to do this, see the .
NAS Devices
- Download the installation package appropriate to your device
- Follow the NAS manufacturer’s installation procedure to install the Plex Media Server
- If you have problems, visit the Plex Media Server NAS forums and search for your device for help
To setup the server, open a browser window and go to (e.g ).
Related Page: Related Page: Forums > Plex Media Server > NAS
For Docker installations please see the Github repo here
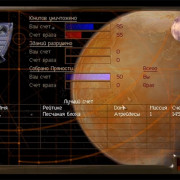
Subtitles
Placement
The Subtitle Placement setting controls the location where subtitles are displayed on the screen when supported and enabled. The user can choose between Lower left, Lower right, Lower middle (the default), Upper left, Upper right, and Upper middle.
Color
The Subtitle Color setting allows the user to specify the color that subtitles are displayed in. They can choose between Light grey, Blended light grey, Yellow, Light yellow, and Blended light yellow.
Size
The Subtitle Size setting controls which preset size subtitles are rendered at: Tiny, Small, Normal, Large, and Huge.
Related Page: Using Subtitles
Создание медиатеки
Для использования PLEX необходимо зарегистрироваться на сайте. Большинство возможностей доступно на бесплатном аккаунте, а за PLEX Pass придется заплатить, но об этом позже.
PLEX позволяет создать медиатеки с разным контентом — фильмы, домашнее видео, музыка, фотографии. Для каждой медиатеки будет выбран определенный способ индексации — сканер.
Сканер автоматически подгружает обложки для альбомов, постеры к фильмам, имена актеров и исполнителей, скачанные сериалы будут разбиты на сезоны.
Можно упростить задачу сканеру — подготовить каталог с файлами в нужной сортировке. Я предполагаю, что вы бережно относитесь к своей коллекции и уже сделали это, но в любом случае можно обратиться к рекомендациям на сайте PLEX.
Plex Media Server — Установка
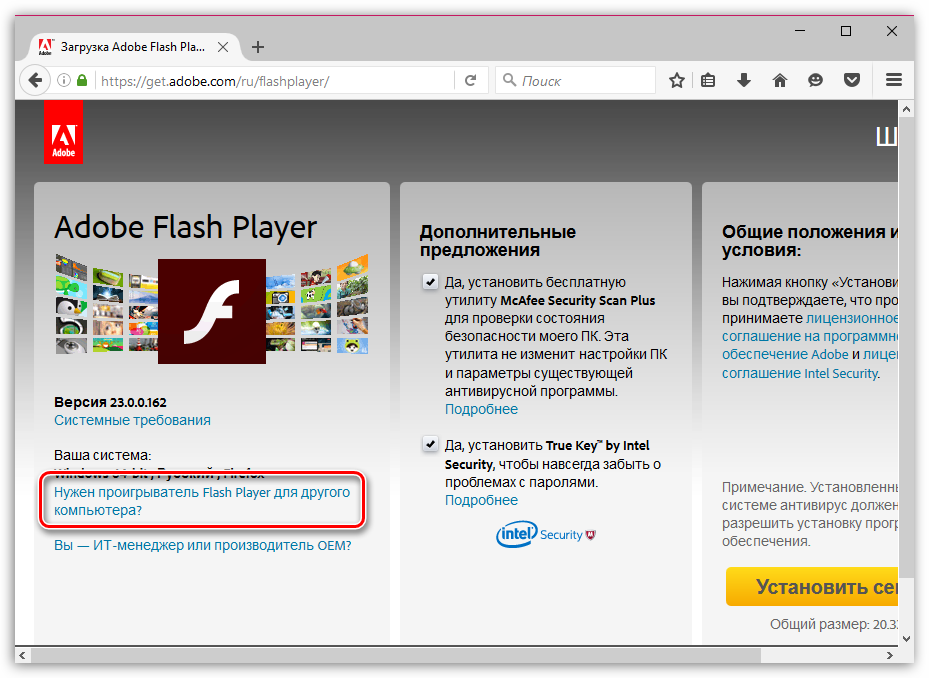
Установить Plex можно или же из файла который находится по данной ссылке, или же посетив сайт разработчиков:
После установки Plex Media Server’a на ПК, в левой нижней части экрана появится иконка Plex сервера:
1
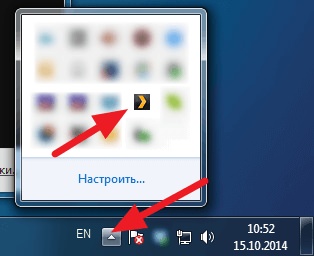
А так же в интернет браузере произойдет автоматический запуск страницы Plex. В случае если запуск страницы не произошел, сделайте двойной щелчок правой клавишей мышки на иконке Plex сервера в нижней левой чати экрана (рис. 1)
2
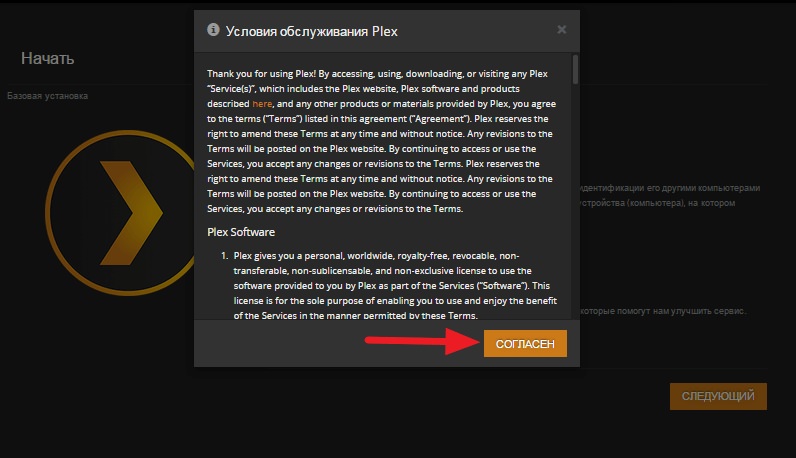
Для продолжения настройки Plex нажмите кнопку «Согласен»,
3

4

5

6

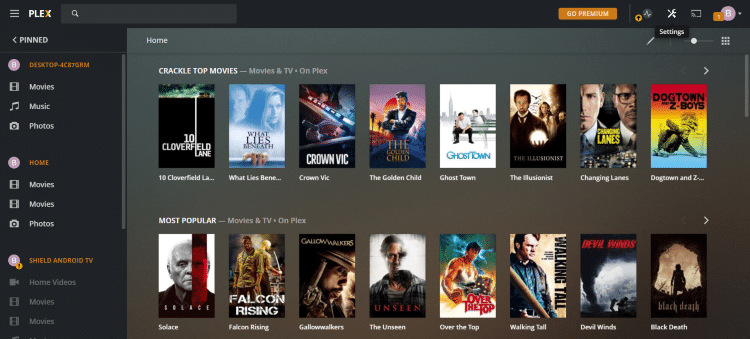
После нажатия кнопки готово, откроется основная страница медиатеки Plex.
7

На данном этапе основная установка Plex Media Server окончена
Для оптимальной работы Plex оставьте все настройки по умолчанию.
1. Setting Up and Installing the Plex Media Server
Choosing a Server—the Server Requirements
Plex Media Server can run on Windows, Mac, or Linux computers—some people use their every-day computer, others have a dedicated computer. It can also be installed on a compatible network attached storage (NAS) device. Generally, Plex works just fine on most modern computers.
Related Page: Related Page:
Plex Media Server Performance Considerations
There are two really important considerations with regards to performance.
First, the Plex Media Server can allow multiple people to view content at the same time. Say everyone in your home views media on Plex at the same time, particularly video—the server has to work harder. So, the more people you expect to view media at the same time, the more powerful the server needs to be. Second, when Plex prepares your files for certain devices or for the available bandwidth, we convert (or “transcode”) the content on-the-fly. This also takes a lot of server resources when it happens, but allows you to watch all your content, no matter how big, on all your devices, no matter how small.
If your server isn’t powerful enough for how you use it, you will notice playback issues such as stuttering, buffering, or sometimes even an inability to play at all. If this happens, it usually means the CPU can’t keep up with the number of users or the amount of transcoding or both. So, you might consider upgrading your hardware. It may also mean that your hardware is fine but your network is too slow.
Related Page: Related Page:
Downloading the Plex Media Server
Once you’ve decided where you are going to install the Plex Media Server, visit the Plex Downloads page and download the Server for your device. It is important to ensure the Server computer has an internet connection while installing. This way, the setup wizard can run correctly and you can set up an account during the process.
Related Page: Plex Downloads
Installing and Running the Plex Media Server
The installation process should be very familiar, since it’s what you normally do on your computer—it is a normal installation program on Windows and you move the downloaded app to your “Applications” folder for OS X.
When the install is finished or when the server is run for the first time, a browser will launch and ask you to either sign in or create a new account on the plex.tv website. You will then be asked to accept the terms of service, and the Setup Wizard will start.
Related Page:
Tip!: It’s important to understand that Plex Media Server does not have its own graphical user interface. When you run the server on your computer, NAS, or other device, you won’t see a window open with a “server UI” or similar. Instead, you use Plex Web App to manage your server.
Intro to Plex
-
- What is Plex?
- Quick-Start & Step by Step Guides for Plex Media Server
- Plex: Free vs Paid
- Exploring More of Plex
-
- Plex Media Server Requirements
- Internet and Network Requirements
-
- What is Plex Pass?
- Plex Pass Feature Overview
- Free Access to Plex Apps
- Plex Pass Subscription Management
- Early Access & Beta Releases
- Sales Tax information
-
- Plex Accounts
- Sign in to Your Plex Account
- Use Google, Facebook, or Apple to Sign in with Plex
- Secure Your Account with Two-Factor Authentication
- Account Audio/Subtitle Language Settings
- I forgot my Plex Account PIN; how can I reset it? How can I change my PIN?
-
- Why can’t the Plex app find or connect to my Plex Media Server?
- Why is my video stream buffering?
- How do I choose the right Streaming Quality in an app?
- Why is some of my content not found?
- Is Plex like Netflix?
- Changelogs and Release Notes
- Log Files
- Why don’t videos from iTunes, Amazon, etc. play?
- Using plex.tv resources information to troubleshoot app connections
- Is Plex Illegal?
-
Guides
- Connect a Player App to Your Plex Account
- Using Hardware-Accelerated Streaming
- Automatically Adjust Quality when streaming
- How to Use Secure Server Connections
- Server Settings – Bandwidth and Transcoding Limits
- Accessing a Server through Relay
- Reporting Security Issues
- Getting Started with Plex Music
- Quick Guide to Mobile Sync
- Forum Community Guidelines
- License Information
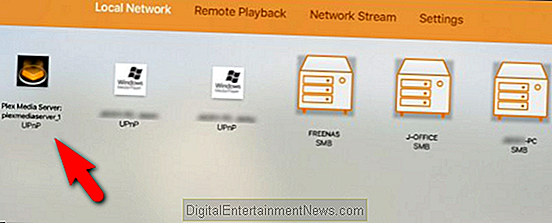
Трюк второй: использование приложений DLNA в качестве запасного варианта
В дополнение к отключению локальной авторизации, как мы это делали в предыдущем разделе, есть еще одна хитрость, которой мы хотим воспользоваться. Есть некоторые клиенты Plex, которые, несмотря на наши изменения на сервере Plex, по-прежнему не будут работать без авторизации с основного сервера Plex. На этом уроке одним из наиболее ярких примеров этой проблемы является официальное приложение Plex для Apple TV — даже если вы настроили IP-конфигурацию, как мы только что сделали, клиент Apple TV испугается, если не сможет получить доступ к Интернету.,
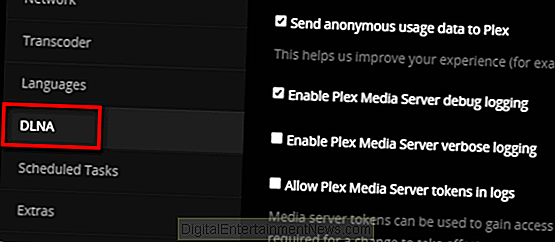
Для того, чтобы сыграть в нее дополнительно, безопасно, мы собираемся использовать отличную резервную систему: DLNA. DLNA — это более старый стандарт, который позволяет локальным устройствам в вашей сети соединяться друг с другом для доступа к мультимедиа. По умолчанию в Plex должен быть включен DLNA, но давайте подтвердим, что это безопасно. В тех же настройках «Сервера», к которым мы обращались в предыдущем разделе, найдите «DLNA» на боковой панели и выберите его.
В разделе DLNA убедитесь, что установлен флажок «Включить сервер DLNA».
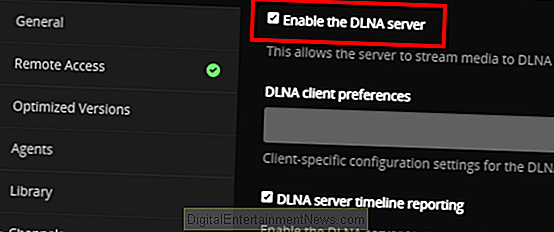
Хотя использование Plex Media Server в качестве сервера DLNA не дает вам полного опыта Plex, оно дает вам доступ ко всем вашим медиафайлам. Любой медиаплеер или клиент с поддержкой DLNA в вашей локальной сети автоматически обнаружит ваш сервер Plex, и вы сможете получить доступ к медиафайлам.
Если, например, у вас есть Apple TV, и вы разочарованы тем, что основное приложение Plex не работает без доступа к Интернету, вы все равно можете получить доступ к фильмам и шоу на своем сервере Plex с помощью DLNA-совместимого приложения, такого как VLC. Фактически, в нашем руководстве по использованию VLC с Apple TV вы даже можете увидеть наш медиа-сервер Plex на некоторых снимках экрана, благодаря интеграции DLNA.
После проверки, чтобы убедиться, что DLNA включена, найдите время, чтобы просмотреть ваши любимые приложения и даже руководства для ваших умных телевизоров и медиа-ресиверов, чтобы найти упоминания о «DLNA» или «UPnP». Узнайте о том, как эти функции работают, и протестируйте их на своем Plex Media Server, чтобы после выхода в Интернет вы были готовы к работе.
Вот и все, что нужно сделать: с двумя небольшими изменениями в программном обеспечении Plex Media Server вы не готовы получить доступ к вашим медиафайлам, даже если интернет не работает или вы собрали всю свою установку Plex в домик, далекий от цивилизации.
Sharing Plex Content
One of the most prominent features of the Plex system is the ability to share content across users.
Anyone with a Plex account is able to share their stored media files with friends, family, and more.
To do so, follow the guide below:
1. Launch Plex Media Server and click settings
2. Select Users & Sharing on the left side menu bar
3. Select Share Libraries next to the Friends Heading
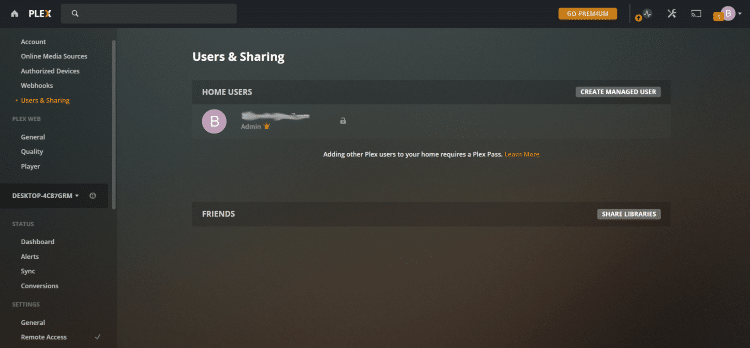
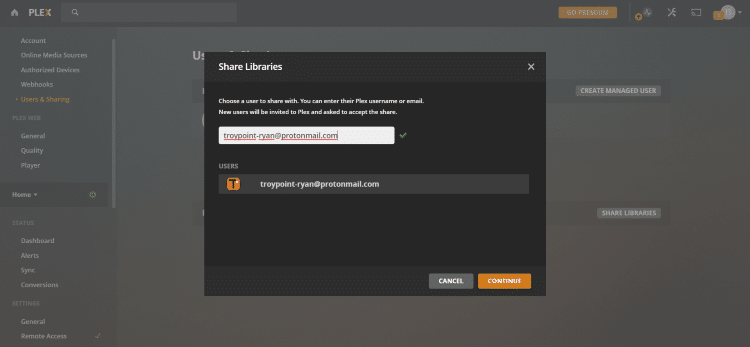
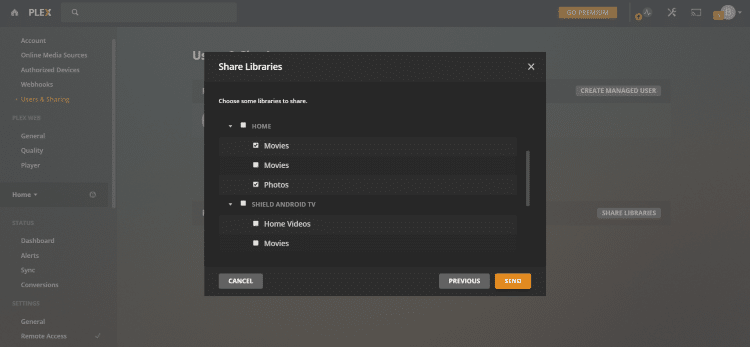
5. Choose the media you wish to share and click Send
6. Click finish or copy and send the provided link to ensure your shared media was delivered
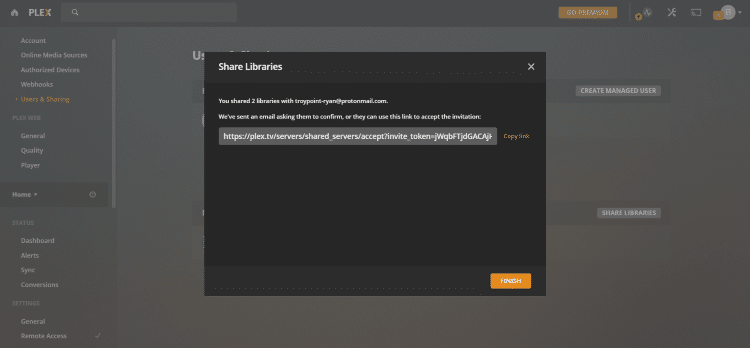
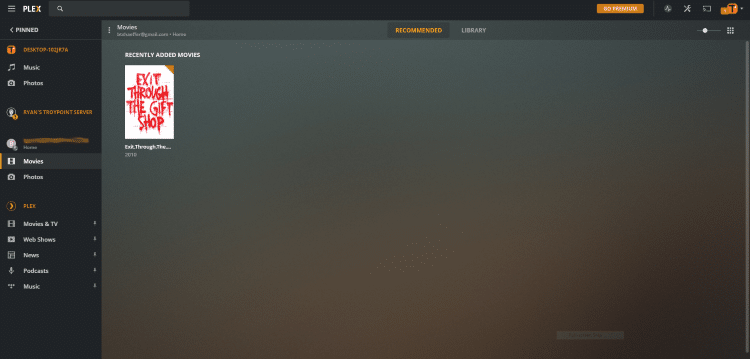
7. Shared content will now be available within the recipient’s media server
That’s it!
Sharing media between Plex users is a great way to enjoy tons of content and fill libraries with your favorite Movies, TV Shows, and more.
Plex makes storing and sharing all of your media a breeze.
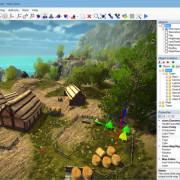
Программное обеспечение
Plex Web App: пользователи могут управлять своими библиотеками, настройками сервера и смотреть контент из этого интерфейса на основе браузера.
Интерфейс телесериала Plex с фоном в стиле фан-арт
Plex — это система медиаплеера с моделью клиент-сервер . Plex Media Server хранит, упорядочивает и передает весь контент, в то время как клиенты — это приложения для воспроизведения, работающие на множестве устройств и веб-браузеров.
Plex Media Server (PMS) — это бесплатный внутренний компонент. Он может получать контент из файлов, iTunes , iPhoto , Aperture или из Интернета и автоматически упорядочивать их по тегам метаданных, таким как название, исполнитель, альбом, жанр, год и популярность. Он организует аудио- и визуальный контент из личных медиабиблиотек и передает его на проигрыватель либо на том же устройстве, либо по сети. PMS может работать на устройствах Windows , macOS , Linux , FreeBSD , NAS или на Nvidia Shield TV .
На фронтальных игроков приложения являются Plex, Plex Web App, Plexamp и Plex тире. Они позволяют пользователю управлять всем контентом Plex Media Server и воспроизводить его. Большинство приложений бесплатны. Приложение Plex является преемником Plex Media Player и работает на множестве платформ: Amazon Appstore , Android , Apple TV , Chromecast , iOS , PlayStation , Sonos , Oculus Go , webOS , Tizen , Windows , Xbox и macOS .
Step by Step
Overview
Getting started with Plex isn’t really any different than installing other software, except that you first install the server software. Then, you install apps on your devices so that each device can connect to the server.
Preparing and Organizing Your Media Collection
Getting your media set up can be an important step. As you set up your Plex Media Server, you’ll be creating libraries for your media—movies, TV shows, music, photos, and home videos. When you do so, Plex will identify and match content like movies and TV shows and then gather things like movie poster artwork, movie casts, TV episode descriptions, and more to make your collections beautiful.
Plex will do its best to automatically identify and match your content. You can help that process out and give yourself the very best results by ensuring that your content follows our media preparation guidelines.
Related Page: Your Media
The “Plex Media Server: Start here!” Video
For those that would prefer a video overview, please check out our “Plex Media Server: Start here!” video.
https://player.vimeo.com/video/262574343
История
Plex начинался как бесплатный хобби-проект в декабре 2007 года, когда разработчик Элан Фейнголд создал приложение медиацентра для своего Apple Mac . Он портирована на медиаплеера XBMC (так как переименованный Коди) для Mac OS X . Примерно в то же время Кейси Ульман и Скотт Олеховски — руководители программного обеспечения, которые недавно продали свою предыдущую компанию Cisco, — также пытались портировать XBMC на OS X и заметили прогресс Файнгольда на онлайн-форумах XBMC . Они связались с ним и предложили поддержку и финансирование, сформировав команду из трех человек в январе 2008 года.
Команда выпустила ранние версии порта под названием OSXBMC, предназначенные для возможной полной интеграции с Mac OS X. Разработчики продолжали сотрудничать с проектом XBMC на базе Linux до 21 мая 2008 г. Из-за различных целей и видения команды XBMC, Вскоре они разделили код на Plex и опубликовали его на GitHub . Код OSXBMC поддерживался примерно синхронизированным с исходным кодом XBMC.
В декабре 2009 года была основана американская компания Plex, Inc., во главе которой Ульман стал генеральным директором, а Фейнголд — техническим директором. В то время у Plex было 130 приложений, самыми популярными из которых были средства просмотра трейлеров Apple Movies Trailers, YouTube , Hulu , Netflix , MTV Music Videos , BBC iPlayer и Vimeo . Фейнголд заявил, что приложения Plex были загружены около миллиона раз. По состоянию на июль 2016 года в Plex работало 65 сотрудников. В декабре 2019 года Plex, Inc. объявила о выпуске поддерживаемых рекламой видео по запросу (AVOD) телешоу и фильмов, доступных во всем мире для бесплатных учетных записей Plex от таких издателей, как Warner Bros. Domestic Television Distribution , MGM , Lionsgate и Legendary . По состоянию на август 2019 года в нем работало около 100 сотрудников по всему миру.
Есть ли у Plex Live TV какие-либо ограничения?
К сожалению, поскольку эта услуга бесплатна и основана на партнерстве с крупными телевизионными сетями в данной стране, у нее есть некоторые ограничения, о которых вам необходимо знать.
Во-первых, нельзя приостанавливать или перематывать прямые телеканалы. Если вы пропустите начало фильма или спортивного мероприятия, вам просто нужно принять это.
Во-вторых, нет функции видеорегистратора. Это отличается от поддержки Plex каналов OTA, которая позволяет вам делать записи через приложение Plex.
Являются ли эти ограничения справедливым компромиссом с учетом количества бесплатного контента? Мы так думаем, но вам нужно будет принять решение самостоятельно.
Main
Automatically Sign In
If you’re a member of a Plex Home, you can use this option to have the app automatically sign in to the last used user and bypass any PIN for that user.
Related Page: Plex Home
Cinema Trailers
The cinema trailers setting controls how many cinema trailers will play before a movie. Source settings can be controlled through Plex Media Server.
Related Page:
Screen Saver
The screen saver setting controls the timeout before the screen saver begins. Note that this is independent from the system.
Auto Play
When the Post Play screen is presented after playback, choose whether an “up next” video should be played automatically after a short countdown.
Allow Fallback to Insecure Connections
When enabled, it means that this device is allowed to make insecure connections to a Plex Media Server if secure connections fail. Available choices:
- Never – (Default) Never fall back to insecure connections without specific action from the user
- On same network as server – Allow fallback, but only when Plex Media Player and the Plex Media Server are on the same network
- Always – Always allow fallback
Layout
- Auto– Allows the app to switch between desktop and TV layout.
- TV – Locks the TV layout and does not automatically switch to desktop mode.
Full Screen
The Full Screen toggle controls whether the app is rendered in full screen or windowed. On OS X, this may result in better results than the full screen window control.
Update Channel
The Update Channel setting lets the user control which update channel the app is subscribed to. Most users will want to leave this set to Stable, but other channels can receive early preview releases depending on the user’s permission level.
Accessing or Restricting the Content
Can my family watch this content?
Absolutely. Our ad-supported Live TV streaming is available to all users for free. If your family members already have their own, regular Plex account, then they’ll have access directly, or they can choose to enable/disable the media source for themselves, as desired.
You can also create a managed user for a family member and add them to your Plex Home for fast user switching.
Related Page: Related Page: Plex Home
Can I restrict the content my child can access?
If you’ve set up a managed user for your child, you can personalize the channel lineup displayed for their account. Do that by switching to their account and personalizing the guide as normal. You can reorder the channels (e.g. putting the “kids” channels at the top) or hide any channels you don’t want them watching.
Note: While you can hide channels for that user, you cannot currently “lock” things or prevent them from personalizing the guide themselves. That includes potentially making channels visible again.
Related Page:
How do I turn Live TV off so I don’t see it?
If you simply don’t want it in the sidebar of your app, you can unpin it via normal customization. You’d still be able to access it (when desired) under the More sidebar entry.
Alternatively, if you’re simply not interested in the service at all, you can disable it for your account altogether. Instructions are available in our “” article.
Related Page:
Last modified on: March 30, 2021
M3U playlist IPTV Player for Plex
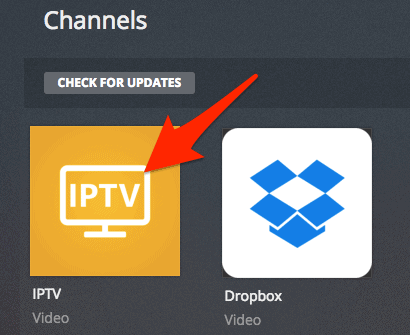
- First up, install the Cigaras IPTV Channel. Once it’s installed, visit the Channels section of Plex.
Locate the IPTV addon and hover your cursor over it until the Settings icon (the “cog”) becomes visible, and then click it.
There are a number of settings you can change, but the most important one is the very first. It’s here that you’ll want to paste the URL to your IPTV .m3u file. If your IPTV provider also includes an XMLTV/EPG URL, paste it in the space provided.
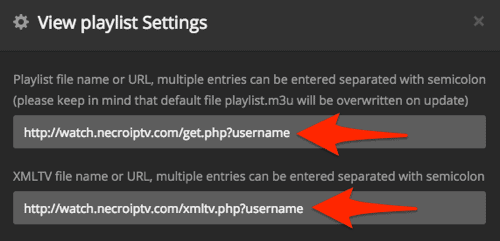
After you’ve reviewed the other settings, click the SAVE button.
Now open the IPTV plugin by clicking it.
Look in the View playlist section for a list of TV channels or groups of TV channels and select one.
Ta-da! Streaming television right within Plex!
Basic Info About Live TV on Plex
Do I need special hardware or a Plex Pass subscription?
Our free streaming does not require any special hardware. All you need is your supported Plex player app. As mentioned, it is a free service, available to everyone, and does not require any Plex Pass subscription.
Our Plex Pass subscribers can optionally connect a compatible tuner device and antenna to their Plex Media Server to watch and record over-the-air broadcasts available at their location. That is not required for this free streaming, though.
They’re two different features, even though both are related to accessing live TV broadcasts.
Related Page: Live TV & DVR
Can I pause or rewind/fast forward live channels?
Unfortunately, due to licensing restrictions, we are not able to offer pausing, rewinding, or fast forwarding of Live TV channels.
Do I need a Plex Media Server? Do these stream through my server?
No, this service is independent of any Plex Media Server. You don’t need to run your own server or have one shared with you. The content streams from online and does not go “through” any Plex Media Server you have installed or shared with you.