Настройка tp-link tl-wr841nd
Содержание:
- Шаг 3 – Настройка интернета
- To Upgrade
- Как прошить роутер TP-Link
- Открываем порт на TP-Link (проброс порта):
- Tags
- Настройка подключения к интернету
- Go back to original firmware
- Характеристики
- Debricking
- Настройка PPtP (VPN) при автоматическом получении локального IP адреса (DHCP)
- To Upgrade
- Supported Versions
- Open Source Code For Programmers (GPL)
- Basic configuration
- Настраиваем безопасность Wi-Fi сети
Шаг 3 – Настройка интернета
Для дальнейшей полной настройки роутера можно воспользоваться Быстрой настройкой:

Т.е. здесь все просто – читайте, что появляется на экране, вводите данные от интернета, вводите пароль от Wi-Fi, придумайте новый пароль для защиты роутера – ВСЕ! Я же предлагаю посмотреть, как настроить роутер TP-Link TL-WR841ND в ручном режиме, на случай если будет нужно что-то оперативно изменить (вроде смены пароля на беспроводную сеть), без уничтожения роутера.

Видите много значений в выпадающем списке? Это и есть те самые типы подключения. Основных их в нашей стране 2 – Динамический IP и PPPoE. Кратко рассмотрим их.
- Динамический IP. Если ваш провайдер раздает подключение по этому типу, скорее всего интернет у вас уже подключен. Здесь ничего особенного не нужно делать, роутер сам все получит. Единственное – если провайдер требует особенного MAC-адреса на роутере (это требование тоже обычно пишется в договоре), нужно заменить его в «Сеть – Клонирование MAC-адреса».
- PPPoE (излюбленная технология Ростелекома) – для доступа дополнительно требуется логин и пароль (тоже указан в договоре). Чуть сложнее, но достаточно просто их ввести здесь, и все подключится:

Другие способы подключения, которые встречаются реже:
Статический IP. Разновидность динамического, но провайдер выдает вам свой выделенный IP адрес. Для подключения достаточно ввести его здесь:

L2TP и PPTP (замечены у мобильных провайдеров, в том числе у Билайна) – еще два VPN подобных способа подключения. Некое объединение предыдущих – здесь может потребоваться ввод логина, пароль, IP адреса и IP адреса сервера. По аналогии с предыдущими – ничего сложного нет, смотрим договор, заполняем нужные данные.
После этого шага на роутере должен появиться интернет. Проверить легко – на странице настройщика «Состояние» в разделе WAN появится IP адрес, а интернетом можно будет пользоваться как по проводу, так и по Wi-Fi.
To Upgrade
IMPORTANT: To prevent upgrade failures, please read the following before proceeding with the upgrade process
- Please upgrade firmware from the local TP-Link official website of the purchase location for your TP-Link device, otherwise it will be against the warranty. Please click here to change site if necessary.
- Please verify the hardware version of your device for the firmware version. Wrong firmware upgrade may damage your device and void the warranty. (Normally V1.x=V1)How to find the hardware version on a TP-Link device?
- Do NOT turn off the power during the upgrade process, as it may cause permanent damage to the product.
- To avoid wireless disconnect issue during firmware upgrade process, it’s recommended to upload firmware with wired connection unless there is no LAN/Ethernet port on your TP-Link device.
- It’s recommended that users stop all Internet applications on the computer, or simply disconnect Internet line from the device before the upgrade.
- Use decompression software such as WinZIP or WinRAR to extract the file you download before the upgrade.
| TL-WR841N_v7_120201 | ||
|---|---|---|
| Published Date: 2012-02-07 | Language: English | File Size: 3.21 MB |
|
| TL-WR841N_V7_111228 | ||
|---|---|---|
| Published Date: 2012-01-11 | Language: English | File Size: 3.21 MB |
|
| TL-WR841N_V7_110726 | ||
|---|---|---|
| Published Date: 2011-07-26 | Language: English | File Size: 2.84 MB |
|
Как прошить роутер TP-Link
Обзор и настройка модема D-Link Dir-320 После того как пользователь получил данные о ревизии сетевого устройства, необходимо зайти на офсайт вендора и скачать правильную версию прошивки. Ссылка на сайт: https://www.tp-link.com.
- Выбираем модель TP-Link. Для примера взята модель TL-WR740N, переходим в раздел «Поддержка».
- Производитель предлагает выбрать версию ревизии.
Прошивки ПО для TP-Link-роутеров хранятся на сайте в зависимости от версий. Также прилагается подробная инструкция по обновлению в видеоформате и FAQ – наиболее часто встречающимся вопросам-ответам.
Скачиваем прошивку. Она представляет собой архив. Его необходимо распаковать на локальном диске, чтобы получить доступ к самой прошивке. Обычно программа представлена в виде файла с расширением .bin, но в старых моделях еще встречается файл .ras. Это устаревший вариант микрокода, не используемый в современных роутерах для обновления.
Далее переходим на веб-ресурс по управлению роутером, чтобы перепрошить его через веб-интерфейс. Прежде чем проводить какие-либо изменения в системе, сделайте резервную копию настроек. Поступаем следующим образом.
- Переходим в «Системные инструменты», потом – «Резервную копию» и «Восстановление».
- Выбираем пункт «Резервная копия».
- Указываем путь для сохранения и нажимаем ОК:
После создания копии переходим к разделу «Обновление встроенного ПО»:
- Нажимаем «Выберите файл», указываем скачанный дистрибутив:
- Нажимаем кнопку «Обновить». Процесс займет несколько минут.
После завершения процесса роутер автоматически перезагрузится. Его настройки сбросятся на заводские.
Существуют и другие способы, чтобы прошить модем TP-Link до актуальной версии.
Прошивка через USB-порт
Роутеры TP-Link, у которых в наличии есть USB-порт, способны получать актуальную версию ПО через флешку. Для этого необходимо загруженный дистрибутив скопировать на флеш-карту, предварительно отформатировав ее.
Следующий шаг – подключение ее через USB-порт к оборудованию. Далее повторяем шаги, описанные выше. То есть, заходим на веб-интерфейс оборудования в раздел с обновлением микропрограммы. Во время выбора файла указываем путь к USB-накопителю, на котором лежит дистрибутив.
Нажимаем «Обновить», ожидаем окончания процесса. Данный способ подходит, если сетевое устройство TP-Link находится на удаленном расстоянии от рабочей станции, и роутер напрямую не подключен ни к одному ПК.
Прошивка через мобильное приложение TP-Link Tether
Обновление прошивки на роутере TP-Link также производится через мобильное приложение. Ниже приведены ссылки для скачивания прошивок с магазина интернет-приложений:
- Android: https://play.google.com/store/apps/details?id=com.tplink.tether&hl=ru.
- iOS: https://itunes.apple.com/ru/app/tp-link-tether/id599496594?mt=8.
Стоит сказать, что у приложений есть список совместимости. Он находится в описании к ПО. Производитель официально заявляет, что список со временем будет пополняться.
Чтобы перепрошить роутер «ТП-Линк», надо скачать приложение, включить «вай-фай» на мобильном устройстве. Далее найти модель, микрокод которой надо обновить, подключаемся к ней через TP-Link Tether. Сетевое оборудование попросит пользователя ввести учетные данные.
После прохождения процедуры авторизации, попадаем в главное меню. В нем нужно посмотреть список подключенных устройств к сетевому оборудованию, установить параметры родительского контроля или изменить конфигурацию подключения к сети «Интернет».
К сожалению, обновить прошивку роутера через мобильное приложение теперь нельзя. На текущий момент функция недоступна.
Альтернативные версии прошивок
Кроме официальных версий прошивок для сетевого оборудования TP-Link, существуют и альтернативные сборки. Они созданы инициативными разработчиками для расширения функциональных возможностей заводских установок роутеров TP-Link для домашнего пользования, а также для точек доступа Auranet.
- Программное обеспечение DD-WRT представляет собой альтернативный вариант микрокода, собранного на основе ядра OC семейства Linux. С его помощью любой роутер превращается в домашний медиасервер. Ссылка: ftp://ftp.dd-wrt.com/betas/.
- Вторая, не менее известная прошивка, – OpenWrt. По сравнению с предыдущей представляет собой не готовый конфиг, а полноценный дистрибутив, собираемый пользователем самостоятельно под свои цели. Программа рассчитана на людей со знаниями в области сборки конфигураций из репозитория Linux-систем.
Способ обновления у них такой же, как и у официальных прошивок.
Открываем порт на TP-Link (проброс порта):
Для того, чтобы пробросить порт на роутере TP-Link TL-WR841ND, Вам надо перейти в раздел «Forwarding» (Переадресация) -> «Virtual Servers» (Виртуальные сервера):

Нажимаем кнопку «Add New» (Добавить Новую). Откроется окно:

Заполняем поля следующим образом: «Service Port» (Порт сервиса) — вводим порт или диапазон портов, которые надо открыть. В поле «IP Address» вводим IP-адрес компьютера в локальной сети, для которого открываем порт. В выпадающем списке «Protocol» надо выбрать используемый протокол — TCP, UDP или любой тип — ALL. «Status» должен быть «Enabled».
Нажимаем кнопку «Save».
Tags
Hardware Highlights
| Version | SoC | CPU MHz | Flash MB | RAM MB | WLAN Hardware | WLAN2.4 | 100 Mbit ports |
|---|---|---|---|---|---|---|---|
| 1, 1.5 | Atheros AR7130 | 300 | 4 | 32 | Atheros AR5416 (mini-PCI) | b/g/n | 5 |
| v10 | Qualcomm Atheros QCA9533-BL3A | 650 | 4 | 32 | Qualcomm Atheros QCA9533-BL3A | b/g/n | 5 |
| v11 | Qualcomm Atheros QCA9533 | 650 | 4 | 32 | Qualcomm Atheros QCA9533 | b/g/n | 5 |
| v12 | Qualcomm Atheros QCA9533 | 650 | 4 | 32 | Qualcomm Atheros QCA9533 | b/g/n | 5 |
| v3 | Atheros AR9132 | 400 | 4 | 32 | Atheros AR9132 | b/g/n | 5 |
| v5 | Atheros AR7240 | 400 | 4 | 32 | Atheros AR9280 | b/g/n | 5 |
| v7 | Atheros AR7241 | 400 | 4 | 32 | Atheros AR9287 | b/g/n | 5 |
| v8 | Atheros AR9341 | 535 | 4 | 32 | Atheros AR9341 | b/g/n | 5 |
| v9 | Qualcomm Atheros QCA9533-AL3A | 550 | 4 | 32 | Qualcomm Atheros QCA9533-AL3A | b/g/n | 5 |
OpenWrt Support
The TP-Link TL-WR841N(D) has multiple different versions as shown in this table.
| Version | Launch Date | Supported from | Notes | |
|---|---|---|---|---|
| v1.x | 2007 | 10.03.1 | Added model support | |
| v3.x | 2008 | 10.03.1 | Forum thread | |
| v5.x | 2010 | 10.03.1 | ||
| v7.x | 2010 | 12.09 | UFO shaped model. | |
| v8.x (China) | ? | No | 2 MiB flash is not enough to run OpenWrt, needs hardware mod. Worked with r29631 trunk. | |
| v8.x (Int.) | 2012 | 12.09 | Forum thread | |
| v9.x | 2014 | 14.07 | 14.07 Barrier Breaker reportedly suffers from slow wifi, upgrade to 15.05 recommended | |
| v10.x | 2015 | 15.05.1 | , | |
| v11.x | 2015 | unknown | Forum thread. Only the flash chip seems to be different compared to v10.x. Supported in trunk as from 2016-04-01. You can use 15.05 images for v10 with sysupgrade -F, overriding the hardware check. |
Firmware downloads
Only OFFICIAL OpenWrt images should be listed here.
| Version | Flash from non-OpenWrt firmware | Upgrade from existing OpenWrt firmware |
|---|---|---|
| v1.x | 15.05.1 Factory image | 15.05.1 Upgrade image |
| v3.x | 15.05.1 Factory image | 15.05.1 Upgrade image |
| v5.x | 15.05.1 Factory image | 15.05.1 Upgrade image |
| v7.x | 15.05.1 Factory image | 15.05.1 Upgrade image |
| v8.x (Int.) | 15.05.1 Factory image | 15.05.1 Upgrade image |
| v9.x | 15.05.1 Factory image | 15.05.1 Upgrade image |
| v10.x | 15.05.1 Factory image | 15.05.1 Upgrade image |
Настройка подключения к интернету
Как только мы зашли в веб-интерфейс маршрутизатора, первым делом нужно настроить подключение к интернету. Проще говоря, в настройках роутера выбрать тип подключения которое использует ваш провайдер, и при необходимости задать нужные параметры.
Только когда у вас будет необходимая информация, можно приступать к настройке. В противном случае может быть много безрезультатных попыток.
Динамический IP (DHCP)
Если у вас провайдер использует этот тип подключения, то интернет через маршрутизатор должен работать без дополнительной настройки (если роутер на заводских настройках) . Так как «Динамический IP» стоит по умолчанию.
В разделе «Сеть» – «WAN» нужно проверить, установлен ли необходимый тип подключения.
Если все подключено и настроено правильно, но интернет через роутер не работает, то скорее всего ваш провайдер делает привязку по MAC-адресу. Уточните этот момент. Если привязка есть, то нужно на роутере клонировать MAC-адрес с компьютера к которому раньше был подключен интернет, или прописать у провайдера MAC-адрес роутера. Он указан снизу на наклейке.
Клонировать MAC можно на вкладке «Сеть» – «Клонирование МАС-адреса».
Роутер должен быть подключен по кабелю к тому ПК, к которому был привязан интернет.
PPPoE и PPTP на TL-WR841ND (Ростелеком, Билайн)
В разделе WAN выберите соответствующий тип подключения PPPoE, или PPTP. И ниже укажите необходимые параметры. Обычно это имя пользователя и пароль. Так же, скорее всего нужно выставить «Динамический IP», и обязательно проверить, чтобы было установлено «Подключить автоматически».
После этого можно пробовать запустить соединение. И если соединение будет установлено, то сохраните настройки.
PPTP настраивается точно так же. Только там еще возможно понадобится указать адрес сервера (его, как и другие параметры выдает провайдер) .
Что делать, если нет подключения к интернету?
Проверьте подключение кабеля в WAN-порт. Убедитесь, что вы задаете правильные параметры. И уточните, есть ли привязка по MAC-адресу. Все это вы можете узнать у своего провайдера
Так же обратите внимание, как ведет себя индикатор интернета. На TP-Link TL-WR841ND он должен активно мигать зеленым цветом
Убедитесь, что интернет напрямую работает (без роутера) .
Если интернет через роутер не работает, то продолжать настройку нет смысла.
Go back to original firmware
→ generic.uninstall
Warning!
This section describes actions that might damage your device or firmware. Proceed with care!
With the TL-WR841ND router, there is a catch: the stock firmware is obtained from the OEM: versions 1,5,7,8,9(versions v1 and v1.5 have same latest fw) and link for v3
- in case the file name of this firmware file does not contain the word “boot” in it, you can simply revert back to original firmware
- in case the file name of this firmware file does contain the word “boot” in it, you need to cut off parts of the image file before flashing it:
The following method applies for the V1, V3, V5, V7, V8, V9, V10 and V13 since the bootloader is the same size.
An example of an image file with the word “boot” in it is .
Cut the first 0x20200 (that is 131,584 = 257*512) Bytes from original firmware:
dd if=orig.bin of=tplink.bin skip=257 bs=512
You should transfer the firmware image to the /tmp folder and revert back to original firmware (if available you can flash the firmware via the webinterface as well):
Via the safer method using sysupgrade:
sysupgrade /tmp/tplink.bin
Or you use the mtd method:
mtd -r write tplink.bin firmware
For the WR841N v14 follow the procedure above, but you must cut only the first 64k, so
dd if=orig.bin of=tplink.bin skip=129 bs=512
It is also possible to revert to the stock firmware using the method with tftp described in “TFTP install”. (you still need the firmware images without the boot part, unless you’re using v13, in which case refer to the instructions for TFTP flashing above).
OEM TP-Link firmware for the TL-WR841ND with the boot part removed or the original firmware if there wasn’t a boot part to revert to the original OEM firmware:
-
TL-WR841N(D) V1 2008613143645.zip
-
TL-WR841N(D) V3 TL-WR841ND-V3-stripped.zip
-
TL-WR841N(D) V5 201112613340616.zip
-
TL-WR841N(D) V7 TL-WR841ND-V7.zip
-
TL-WR841N(D) V8 TL-WR841ND-V8-stripped.zip
-
TL-WR841N(D) V9 TL-WR841ND-V9-stripped.zip
-
TL-WR841N(D) V10 TL-WR841ND-V10-stripped.zip
Характеристики
| Бренд | TP-Link |
| Модель | TL-WR841N |
| Скорость передачи Wi-Fi | до 300 Мбит/с |
| Частота | 2,4 ГГц |
| Стандарт IEEE 802.11 | b/g/n |
| Антенны | 2 на 5 dBi (несъемные) |
| Защита беспроводной сети | WEP/WPA/WPA2, WPA-PSK/WPA2-PSK |
| Ethernet порты | 1 порт WAN 100 Мбит/с |
| 4 порта LAN 100 Мбит/с | |
| USB порты | нет |
| Тип подключения WAN | Динамический IP, Статический IP, PPPoE, PPTP, L2TP |
| Размеры | 173 x 118 x 33 мм |
У модели на текущий момент 14 аппаратных версий, устройство выпускается давно. У меня 13 — интерфейс бирюзовый, раньше использовался зеленого цвета.
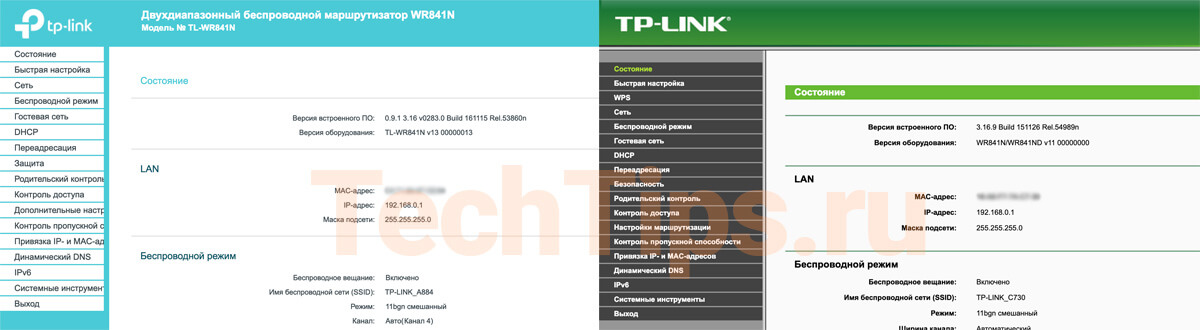 Виды веб-интерфейсов TL-WR841N
Для беспроводных клиентов поддерживает однополюсный стандарт Wi-Fi IEEE 802.11n. Это означает, что он работает только на частоте 2,4 ГГц. Если рассматривать новые роутеры, то там есть возможность подключиться к 5 ГГц сети.
Диапазон 2,4 ГГц, в текущих реалиях, практически всегда перегружен из-за большого количества Wi-Fi устройств, работающих на нем. Плюс некоторые телефоны и часть других домашних электронных устройств используют данный диапазон. Из-за помех скорость работы Wi-Fi будет снижаться, и точно не приблизится к заявленным 300 Мбит/сек.
На текущий момент у большинства новых роутеров все порты гигабитные. Но в этом устройстве используется стандарт Fast Ethernet и больше 100 Мбит/сек по кабелю он не выдаст. Вне зависимости от вашего тарифного плана.
В последних аппаратных версиях, например V13 и V14, можно менять режим роутера:
- беспроводной роутер — выбран изначально: запускает интернет, раздает по кабелю и Wi-Fi;
- WISP (аналог WDS) — получает сигнал по Wi-Fi от другого роутера и раздает интернет дальше по кабелю и по беспроводному соединению;
- точка доступа — подключается кабелем к другому маршрутизатору и дальше раздает интернет.
- усилитель Wi-Fi сигнала — усиливает беспроводной сигнал от другого устройства.
 Режимы работы TL-WR841N
Нет USB-порта, поэтому не получится подключить 3G/4G модем, флешку или принтер.
Также поддерживает базовые возможности:
- проброс портов, DMZ;
- WPS, гостевая сеть;
- родительский контроль, блокировка устройства по MAC-адресу.
Интерфейс стандартный, у всех моделей TP-Link подобный, поэтому проблем с настройками возникнуть не должно. Есть возможность управлять устройством с помощью приложения Tether.
Debricking
V 7.2 July 2012
- Disconnect the router from the internet, connect it with a PC via RJ45 cable and perform a 30/30/30 restart
- Change the ip on the PC to 192.168.1.2, subnet mask must be 255.255.255.0 and restart the router by unplugging the power cable
-
Perform a failsafe boot, quickly use
telnet 192.168.1.1
If this didnt work check the ip adress on the PC or if you were too slow to connect during the failsafe mode. Still not working? Read this!
In telnet do the following things one after another:
Define a passwordpasswd
enter
yourpassword
enter
againyourpassword
enter
Kill the broken OWRT firmwaremtd -r erase rootfs_data
enter
firstboot
enter
reboot -f
After rebooting log in again just to check if the router is accessable. If you cant start again at the beginning.
Now change the network settings on the PC back to “Aquire IP adress automatically” and connect the router with the internet. Do a manual reboot by simply turning it off and back on again. The PC should now get an ip adress by DHCP. If this is the case you successfully resetted the router. If not repeat from the beginning or do this if you like.
Basically the router now works like after the initial flash to OWRT. Now you have to configure the internet connection and probably you want to install LUCI. After that open your browser, connect to 192.168.1.1 and log in with the data you entered via telnet.
Debricking see the above, but you will have to plug your cable to WAN port in failsafe to be able to telnet 192.168.1.1.
Настройка PPtP (VPN) при автоматическом получении локального IP адреса (DHCP)
- Слева выбираем меню Сеть (Network), далее Клонирование MAC-адреса (MAC Clone)
- Нажимаем Клонировать MAC-адрес (Clone MAC address), далее Сохранить
- В поле Тип WAN подключения (WAN Connection Type): PPTP
- Имя пользователя (User Name): ваш логин по договору
- Пароль (Password): ваш пароль по договору . В некоторых прошивках чуть ниже просит подтвердить пароль (Confirm Password)
- Выбираем Динамический IP адрес (Dinamic IP address)
- В поле IP-адрес/Имя сервера (Server IP Address/Name ставим) — вводите название или ip-адрес сервера. Узнаете у провайдера.
- Режим подключения WAN (WAN connection mode) — Подключить автоматически (Connect Automatically)
- После введения вышеперечисленных настроек нажимаем Сохранить (Save). Интернет настроен.

To Upgrade
IMPORTANT: To prevent upgrade failures, please read the following before proceeding with the upgrade process
- Please upgrade firmware from the local TP-Link official website of the purchase location for your TP-Link device, otherwise it will be against the warranty. Please click here to change site if necessary.
- Please verify the hardware version of your device for the firmware version. Wrong firmware upgrade may damage your device and void the warranty. (Normally V1.x=V1)How to find the hardware version on a TP-Link device?
- Do NOT turn off the power during the upgrade process, as it may cause permanent damage to the product.
- To avoid wireless disconnect issue during firmware upgrade process, it’s recommended to upload firmware with wired connection unless there is no LAN/Ethernet port on your TP-Link device.
- It’s recommended that users stop all Internet applications on the computer, or simply disconnect Internet line from the device before the upgrade.
- Use decompression software such as WinZIP or WinRAR to extract the file you download before the upgrade.
| TL-WR841ND_V11_150616 | ||
|---|---|---|
| Published Date: 2015-09-08 | Language: English | File Size: 3.75 MB |
|
Supported Versions
The TP-Link versioning scheme seems to be:
- major-number.minor-number, where the major-number refers to hardware changes, and the minor-number refer to software (firmware) changes; this includes the bootloader!
- If there is a language-code. e.g. (DE)v1.0, that means, that the TP-Link WebUI is that language. (Of course )
- Sometimes, version x. is only available in the PRC and version y. is intended for sale world-wide. The hardware between version x. and version y. can differ significantly but does not have to.
- Sometimes, there is Version x. for PRC only and Version x. for world-wide sale. If there is a special chinese-Version with the same major-number, then that version has usually significantly different hardware
| Version/Model | Launch Date | OpenWrt Versions Supported | Download latest stable version | Model Specific Notes |
|---|---|---|---|---|
| v1.x | 2007 | 10.03 & newer | 15.05.1 | Added model support |
| v3.x | 2008 | 10.03 & newer | 15.05.1 | Report |
| v5.x | 2010 | 10.03 & newer | 15.05.1 | |
| v7.x | 2010 | 12.09 & newer | 15.05.1 | UFO shape – Fully working with 12.09 |
| v8.x (China) | ? | 2 MiB flash is not enough to run OpenWrt, needs hardware mod. Worked with r29631 trunk. | ||
| v8.x (international) | 2012-Aug | 12.09 & newer | 18.06.9 | |
| v9.x | 2014 | 14.07 & newer | 18.06.9 | |
| v10.x (China) | ? | 1 MiB flash is not enough to run OpenWrt, needs hardware mod. | ||
| v10.x (international) | 2015 | 15.05.1 | 15.05.1 | Forum thread . Corresponding ticket –> |
| v11.x | 2015 | v10 image or trunk oder LEDE 17.01.2 | — | Forum thread here. Only the flash chip seems to be different compared to v10.x. Supported in trunk as from 2016-04-01. You can use 15.05 images for v10 with sysupgrade -F, overriding the hardware check. Compared to v10.0, the antennas have a different shape (a lot like the antennas shipped with Archer C7), and the WAN LED is now duocolour, green and orange. For v15.05.1, an image built from SVN r49389 works out of the box. |
| v12.x | 2016 | LEDE 17.01.2 | — | |
| v13.x | 2017 | 18.06 & newer | 19.07.4 | |
| v14.x | 2018 | — |
Open Source Code For Programmers (GPL)
Please note: The products of TP-Link partly contain software code developed by third parties, including software code subject to the GNU General Public Licence (“GPL“), Version 1/Version 2/Version 3 or GNU Lesser General Public License («LGPL»). You may use the respective software condition to following the GPL licence terms.
You can review, print and download the respective GPL licence terms here. You receive the GPL source codes of the respective software used in TP-Link products for direct download and further information, including a list of TP-Link software that contain GPL software code under GPL Code Center.
Basic configuration
With BARRIER BREAKER (Bleeding Edge, r40867)
Tested with the wr841n v9 with or better . The system supports multiple virtual access points.
Modify the files that follows according to your needs (and, in the case, search for the file definition here in the wiki to understand how it works)
etc/config/wireless
config wifi-device  radio0
        option type     mac80211
        option channel  9 #same channel of the existing wifi network
        option path     'platform/qca953x_wmac'
        option txpower  12 #this depends on your needs, default is 20 dBm. Lower it is healthier (citation needed)
        # REMOVE THIS LINE TO ENABLE WIFI:
        #option disabled 1

config wifi-iface
        option device   radio0
        option network  lan
        option mode     ap
        option ssid     'This_is_a_new_wifi_network'
        option encryption       psk2 #wpa2 psk
        option key      'this_is_the_wifi_password'

config wifi-iface
        option device   radio0
        option network  wan
        option mode     'sta'
        option ssid     'This_is_the_name_of_the_existing_wifi_network'
        option encryption       psk2
        option key      'this_is_the_wifi_password_to_get_the_connection'
etc/config/network
config interface 'loopback'
        option ifname 'lo'
        option proto 'static'
        option ipaddr '127.0.0.1'
        option netmask '255.0.0.0'

config globals 'globals'
        option ula_prefix 'here is written something, no need to modify it'

config interface 'lan'
        option ifname 'eth0'
        option force_link '1'
        option type 'bridge'
        option proto 'static'
        option ipaddr '192.168.11.1' ä modify this according to you needsfor the lan network
        option netmask '255.255.255.0'
        option ip6assign '60'

config interface 'wan'
        #option ifname 'eth1'
        option proto 'dhcp'

config interface 'wan6'
        option ifname '@wan'
        option proto 'dhcpv6'

config switch
        option name 'switch0'
        option reset '1'
        option enable_vlan '1'

config switch_vlan
        option device 'switch0'
        option vlan '1'
        option ports '0 1 2 3 4'
etc/config/dhcp
Pratically unchanged
config dnsmasq
        option domainneeded '1'
        option boguspriv '1'
        option filterwin2k '0'
        option localise_queries '1'
        option rebind_protection '1'
        option rebind_localhost '1'
        option local '/lan/'
        option domain 'lan'
        option expandhosts '1'
        option nonegcache '0'
        option authoritative '1'
        option readethers '1'
        option leasefile '/tmp/dhcp.leases'
        option resolvfile '/tmp/resolv.conf.auto'

config dhcp 'lan'
        option interface 'lan'
        option start '100'
        option limit '150'
        option leasetime '12h'
        option dhcpv6 'hybrid'
        option ra 'hybrid'
        option ndp 'hybrid'

config dhcp 'wan'
        option interface 'wan'
        option ignore '1'

config odhcpd 'odhcpd'
        option maindhcp '0'
        option leasefile '/tmp/hosts/odhcpd'
        option leasetrigger '/usr/sbin/odhcpd-update'

config dhcp 'wan6'
        option dhcpv6 'hybrid'
        option ra 'hybrid'
        option ndp 'hybrid'
        option master '1'
etc/config/firewall
Pratically unchanged because the “client” wifi is connected to the “wan” interface, while the “repeater” wifi is connected to the lan interface, thus the firewall is basically already configured.
config defaults
        option syn_flood        1
        option input            ACCEPT
        option output           ACCEPT
        option forward          REJECT
# Uncomment this line to disable ipv6 rules
#       option disable_ipv6     1

config zone
        option name             lan
        list   network          'lan'
        option input            ACCEPT
        option output           ACCEPT
        option forward          ACCEPT

config zone
        option name             wan
        list   network          'wan'
        list   network          'wan6'
        option input            REJECT
        option output           ACCEPT
        option forward          REJECT
        option masq             1
        option mtu_fix          1

config forwarding
        option src              lan
        option dest             wan
Final actions
Just be sure that the files are saved. To edit the files on windows, either use vi on the openwrt, check for a tutorial online, the basic commands are not difficult; or use winscp with a SCP connection and edit the files with an editor on windows. Then reboot the system and check for the wifi connection.
Remember that if the “client” wifi doesn’t work, won’t work also the repeater wifi network.
attitude_adjustment 12.09 (final)
The default wireless configuration is different, for example
there is no: ‘ .
Further investigation shown that the wireless is able to provide an AP
if connected to whatever interface defined in ,
while for ‘sta’ mode (a wifi client) it is possible to obtain it only if
the interface connected to the wireless configuration is not using the option nor having a relation to a switch with more than one port (for example if with eth0 we define a switch over multiple ports) Note: would be better to check this statement more thoroughly.
For example, with the configuration reported above for barrier breaker, the wlan is linked with the wan side, that is using no switch interfaces nor bridge protocol. This works too for 12.09.
Настраиваем безопасность Wi-Fi сети
Теперь настроим безопасность сети (поставим пароль). Идем обратно «Wireless» и жмем «Wireless Security».
Тут нам нужно настроить шифрование и поставить пароль. Ставим точку возле надписи «WPA2-PSK» (Этот тип шифровки считается самым безопасным, так что другие не рассматриваем). «Encryption» оставим Automatic. Дальше вводим пароль, желательно, чтоб он был сложным (и не забудьте записать).

После настройки жмем Сохранить (Save).
Теперь разберемся с появившийся внизу надписью.
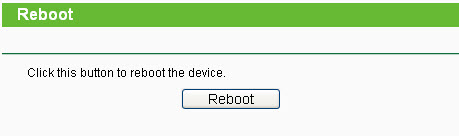
Жмем Reboot , ждем полной перезагрузки. Все, подключение настроек завершено. Приятного вам пользования роутером Тп линк .