Элемент textarea
Содержание:
- HTML Теги
- Reset Styles#
- HTML Text Area No Word Wrap:
- HTML — Text Areas: Readonly
- HTML Readonly Attribute:
- HTML Read Only Text Areas:
- HTML — Text Areas: Disabled
- HTML Code:
- Disabled Textareas:
- Атрибуты тега textarea
- Трюки с textarea
- 1. Изображение в качестве фона, которое пропадает при вводе текста.
- 2. Placeholder в HTML5
- 3. Placeholder, HTML5 с поддержкой старых браузеров используя jQuery
- 4. Удаляем обводку textarea
- 5. Запрет изменения размера
- 6. Добавление возможности изменения размера
- 7. Изменение размера под содержимое
- 8. Nowrap
- 9. Удаляем скролл-бары в IE
- Пример использования
- Получение значения из поля textarea -> javascript
- Attributes of HTML5 Textarea Attributes: Here’s What You Should Know
- HTML TextArea maxlength
- с фиксированным размером (no resize textarea)
- HTML Теги
- JavaScript
- Create CSS Variables for Theming#
- readonly CSS Style#
- :focus State Styles#
- HTML5 Textarea Attributes
- HTML Textarea Form Element:
- HTML — Textarea Wrap
- HTML Text Area Word Wrap Code:
- HTML Text Area Word Wrap:
- HTML Text Area No Word Wrap:
- HTML Text Area No Word Wrap:
- HTML — Text Areas: Readonly
- HTML Readonly Attribute:
- HTML Read Only Text Areas:
- HTML — Text Areas: Disabled
- HTML Code:
- Disabled Textareas:
- Textarea Object Properties
HTML Теги
<!—><!DOCTYPE><a><abbr><acronym><address><applet><area><article><aside><audio><b><base><basefont><bdi><bdo><big><blockquote><body><br><button><canvas><caption><center><cite><code><col><colgroup><data><datalist><dd><del><details><dfn><dialog><dir><div><dl><dt><em><embed><fieldset><figcaption><figure><font><footer><form><frame><frameset><h1> — <h6><head><header><hr><html><i><iframe><img><input><ins><kbd><label><legend><li><link><main><map><mark><menu><menuitem><meta><meter><nav><noframes><noscript><object><ol><optgroup><option><output><p><param><picture><pre><progress><q><rp><rt><ruby><s><samp><script><section><select><small><source><span><strike><strong><style><sub><summary><sup><svg><table><tbody><td><template><textarea><tfoot><th><thead><time><title><tr><track><tt><u><ul><var><video>
Reset Styles#
As is included in all my tutorials as a modern best practice, we add the following reset first:
As seen in the initial state of the fields across browsers, some standout differences were in border type, background color, and font properties.
Interestingly, and do not inherit from the document like typography elements do, so we need to explicitly set them as part of our reset.
Also of note, an input’s should compute to at least 16px to avoid zooming being triggered upon interaction in mobile Safari. We can typically assume equals , but we’ll explicitly set it as a fallback and then use the newer CSS function to set as the minimum in case it’s smaller than (h/t to Dan Burzo for this idea).
We set our to use the theme variable, and also created a slightly rounded corner.
After this update, we’re already looking pretty good:
It may be difficult to notice in that screenshot, but another difference is the height of each field. Here’s a comparison of the text input to the file input to better see this difference:
Let’s address this with the following which we are applying to our class as long as it is not placed on a :
We included since when it’s not a it’s impossible for an input to be multiline. We also set our height in due to considerations of specifically the file input type. If you know you will not be using a file input type, you could use here instead for flexibility in creating various sized inputs.
But, critically, we’ve lost differentiation between editable and input types. We also want to define with more of a hint that it’s also un-editable, but still interactive. And we have a bit more work to do to smooth over the file input type. And, we want to create our themed state.
HTML Text Area No Word Wrap:
As you can see many times word wrapping is often the desired look for your text areas. Since it makes everything nice and easy to read.
HTML — Text Areas: Readonly
Setting a «yes» or «no» value for the readonly attribute determines whether or not a viewer has permission to manipulate the text inside the text field.
HTML Readonly Attribute:
<textarea cols="20" rows="5" wrap="hard" >
As you can see many times word wrapping is often the desired look for your text areas. Since it makes everything nice and easy to read.
</textarea>
HTML Read Only Text Areas:
As you can see many times word wrapping is often the desired look for your text areas. Since it makes everything nice and easy to read.
This read-only behavior allows a web surfer to see and highlight the text inside the element, but he or she cannot alter it in any way. When highlighted, the user may also Copy (Ctrl + C on a PC, Ctrl-Click on a Mac) the text to local clipboard and paste it anywhere he/she pleases.
HTML — Text Areas: Disabled
Disabling the textarea altogether prevents the surfer from highlighting, copying, or modifying the field in any way. To accomplish this, set the disabled property to «yes».
HTML Code:
<textarea cols="20" rows="5" wrap="hard" >
As you can see many times word wrapping is often the desired look for your text areas. Since it makes everything nice and easy to read.</textarea>
Disabled Textareas:
As you can see many times word wrapping is often the desired look for your text areas. Since it makes everything nice and easy to read.
Keep in mind that just because users are unable to copy from the screen directly doesn’t prevent them from taking a screen capture or extracting the data from the source code. Disabling the textarea offers no security whatsoever.
- Continue
Атрибуты тега textarea
| Атрибут | Значения | Описание |
|---|---|---|
| autofocus | не указывается / autofocus |
Логический атрибут. Если указан, при загрузке документа фокус будет переведен на текстовую область. |
| cols | число |
Определяет ширину текстовой области. Ширина области рассчитывается в пикселях как ширина символа, умноженная на значение этого атрибута. Значение приблизительно равняется количеству символов моноширинного шрифта, которые должны занимать полную строку в текстовой области. |
| disabled | не указывается / disabled |
Логический атрибут. Если указан, делает текстовую область неактивной. Данные текстовой области, отмеченной этим атрибутом, не будут переданы на сервер при отправке формы. Также отключает возможность ввода текста в текстовую область. |
| form | id формы |
Указывает на форму, к которой относится текстовая область. Используется, если <textarea> находится вне HTML кода формы. Если текстовая область находится внутри тега <form>, то использовать атрибут form не нужно, текстовая область по умолчанию привязана к форме, внутри которой находится. |
| maxlength | число |
Определяет максимальное количество символов, которые пользователь может ввести в текстовую область. По умолчанию объем текста в текстовой области не ограничен. |
| name | текст |
Имя текстовой области. Используется при передаче данных формы на сервер. Значение (текст) текстовой области будет передано в переменной, имеющей имя, указанное в этом атрибуте. |
| placeholder | текст |
Текст, который будет отображаться внутри текстовой области, когда она не заполнена текстом. Обычно это описание того, что должен ввести пользователь, либо пример заполнения. |
| readonly | не указывается / readonly |
Логический атрибут. Если указан, пользователь не сможет изменить значение (текст) в текстовой области. Используется для создания текстовых областей, доступных только для чтения. |
| required | не указывается / required |
Логический атрибут. Если указан, текстовая область будет определена как обязательная для заполнения. Форма не будет отправлена на сервер, если текстовая область не будет заполнена. Заполнение контролируется браузером. При попытке отправить форму с незаполненной обязательной текстовой областью, браузеры обычно выводят на экран ошибку заполнения. |
| rows | число |
Определяет высоту текстовой области. В качестве значения необходимо указать количество строк, которые должны быть видны без прокрутки (скроллинга). |
| wrap | hardsoft |
Определяет правила переноса строк: Значение hard: символы переноса строки будут добавлены в конце каждой строки в текстовой области. Таким образом, введенный текст из текстовой области переданный на сервер будет иметь ширину не больше, чем ширина <textarea>. Для использования этого значения необходимо указать атрибут cols. Значение soft: символы переноса ставятся там, где их ставил пользователь. Таким образом текст из текстовой области, переданный на сервер в дальнейшем сможет растягиваться под ширину тега-контейнера. Значение по умолчанию. |
Трюки с textarea
В статье представлено несколько трюков, которые вы, возможно, не знали и которые вы найдёте полезными в своих разработках.
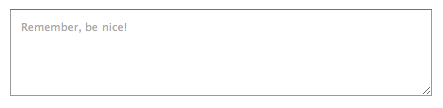
1. Изображение в качестве фона, которое пропадает при вводе текста.

Вы можете добавить фоновое изображение также, как и в любой другой элемент. В этом случае стиль по умолчанию для textarea изменяется, а именно бордер толщиной в 1px изменяется на скошенную границу. Исправляется это явным указанием бордера.
Фоновое изображение может повлиять на читаемость текста. Поэтому фоновое изображение надо убирать при получении фокуса и возвращать его, если textarea осталась без текста. Например, используя jQuery это можно сделать таким образом:
2. Placeholder в HTML5
В HTML5 появился новый атрибут, называемый placeholder. Значение этого атрибута показывается в текстовом элементе и исчезает при получении фокуса, а также в случае когда в элементе введён текст.
HTML5 placeholder поддерживается в следующих браузерах: Safari 5, Mobile Safari, Chrome 6, и Firefox 4 alpha.
3. Placeholder, HTML5 с поддержкой старых браузеров используя jQuery
Самый простой способ проверить поддерживается ли атрибут браузером это проверить с помощью javaScript:
Затем можно написать код, который будет срабатывать если браузер не поддерживает атрибут placeholder.
4. Удаляем обводку textarea
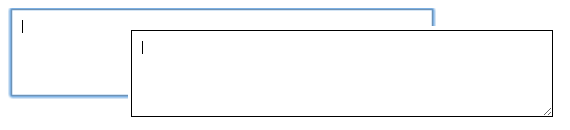
Браузеры на движках webkit, а также в FireFox 3.6, обводят textarea, когда он находится в фокусе. Удалить эту обводку можно используя css-свойство outline для webkit-браузеров. Для FireFox используется свойство -moz-appearance, либо можно просто установить элементу бордер или фон.
5. Запрет изменения размера
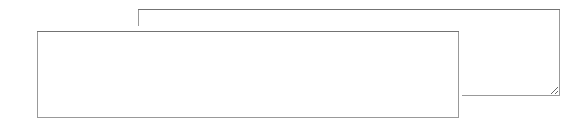
Webkit-браузеры добавляют к textarea визуальный элемент в правом нижнем углу, который позволяет изменять размер текстовой области. Если вы хотите убрать эту возможность, то вам необходимо использовать следующее css-свойство:
6. Добавление возможности изменения размера
jQuery UI позволяет добавить возможность изменения размера для textarea. Это работает для всех браузеров, а для webkit-браузеров подменяет стандартное поведение. Для того, чтобы использовать эту возможность, необходимо подключить jquery.ui и написать следующий код:
7. Изменение размера под содержимое
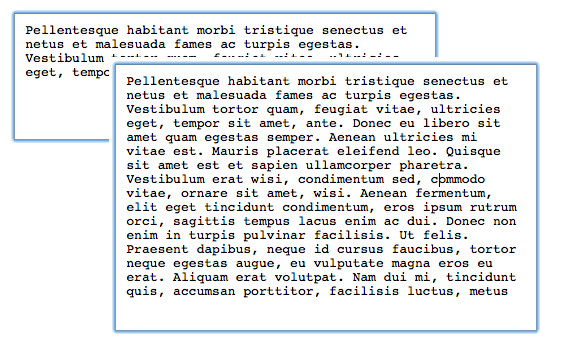
James Padolsey написал удобный jQuery-скрипт который позволяет автоматически изменять размер textarea под его содержимое. Похоже что этого плагина больше нет, но можно использовать например вот этот. Плагин содержит много настроек, но самый простой способ его использовать это:
8. Nowrap
Чтобы не переносить слова на новые строки, для всех элементов используется css-свойство white-space, которое не работает с textarea. Для textarea необходимо использовать атрибут wrap.
9. Удаляем скролл-бары в IE
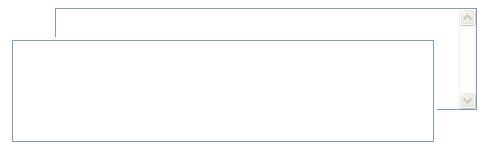
IE показывает вертикальный скролл-бар для всех textarea. Вы можете их спрятать используя overflow: hidden, но в таком случае он не будет показываться при увеличении контента. Поэтому правильнее использовать следующий подход:
В этом случае скролл-бар не будет отображаться когда в textarea помещается весь текст, но выведется в случае необходимости.
Примеры к статье вы можете посмотреть здесь.
Пример использования
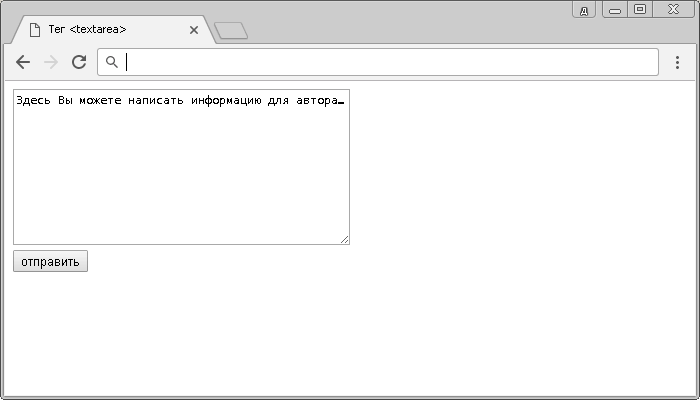
<!DOCTYPE html>
<html>
	<head>
		<title>Пример использования тега <textarea></title>
	</head>
	<body>
		<form>
			<textarea  name = "auth_msg" rows = "10" cols = "45">Здесь Вы можете написать информацию для автора…</textarea><br>
			<input type = "submit" name = "submitInfo" value = "отправить">
		</form>
	</body>
</html>
В данном примере мы создали текстовую область (HTML тег <textarea>), атрибутом name присвоили ей имя (name = «auth_msg»), атрибутом rows задали высоту строк равной десяти символам (rows = «10»), и атрибутом cols указали ширину поля равной 45 символов (cols = «45»).
Кроме того, мы разместили внутри формы кнопку, которая служит для отправки формы (элемент <input> с типом кнопки «отправка формы»: type = «submit»).
Результат нашего примера:
Текстовая область в HTML.
Получение значения из поля textarea -> javascript
Для получения из формы textarea значения в javascript, ничего кроме самой формы textarea нам не нужно! И вообще! В javascript нам потребуется лишь уникальная метка, с помощью которой мы сможем обратиться к тегу, как мне кажется самый простой это работать с id, поэтому во внутрь помещаем како-то уникальный id :
<textarea id=»id_textarea»></textarea>
Данные которые попадают в поле textarea, находятся в value
Далее данные из textarea получают таким образом:
var название_переменной = id_textarea.value;
Но поскольку, вы так, ничего не увидите и не поймете, а вообще- попадает, что-то из textarea, нам потребуется написать пару строк, которые вам покажут в процессе набора, что у нас попадает в textarea
Далее, чтобы вы смогли увидеть значение value из textarea, создадим отдельный блок, в который и будет отправлять это значение!
<div id=»therezult»></div>
Далее нам потребуется скриптик javascript , который и выведет значение value на экран:
<script> id_textarea.addEventListener(«keyup», event => { therezult.innerHTML = id_textarea.value; });</script>
Если вам интересно, то соберем весь код вместе:
<div id=»therezult»></div>
<textarea class=»width_99 height_100″ name=»id_textarea» id=»textarea»></textarea>
<script> id_textarea.addEventListener(«keyup», event => { therezult.innerHTML = id_textarea.value; });</script>
Результат — получение данных из textarea в реальном времени и выводе этого значения на экран! Чтобы увидеть данный процесс — начните вводить данные в textarea
Сюда, будем отправлять! post в javascriptphp ajax jQuery
Последняя дата редактирования : 09.03.2021 12:26
//dwweb.ru/comments_1_5/include/img/hand_no_foto.png
no
no
Attributes of HTML5 Textarea Attributes: Here’s What You Should Know
| Attribute name | Values | Notes |
|---|---|---|
| <textarea name=»»> | Adds a name attribute to a <textarea> element and associates the name with the text added to the text area. | |
| <textarea wrap=»»> | Determines whether or not submitted text wraps when a <textarea> is included in a form submission. | |
| <textarea cols=»»> | Specifies the visible width of a <textarea> element in average character widths. Defaults to 20 if not specified. | |
| <textarea disabled> | Disables the entry of text into a <textarea> element. | |
| <textarea tabindex=»»»> | Sets the position of a <textarea> element in the tab order. | |
| Textarea Onchange: Get The HTML Code To Trigger A JavaScript Event Now | Adds an event listener to a <textarea> which executes JavaScript scripting when an onchange event occurs. | |
| <textarea onKeyPress=»»> | Adds an event listener to a <textarea> element which executes JavaScript scripting when an onKeyPress event occurs. |
HTML TextArea maxlength
Do You know? You can set the limit of TextArea by using the HTML TextArea maxlength attribute.
See below example code line. By adding maxlength attribute with the value it 10, then only 10 characters the user can enter.
Disabled
Is it possible to do HTML Textarea disabled? Yes by using a Disabled attribute in a tag like – <textarea disabled>.
See Below for example code line. After this, a TextArea is not editable. A User can edit or enter any value.
TextArea resize
At the left-bottom TextArea resize optionally available. Where users can easily increase the size of it.
You can do the HTML textarea size property fixed by using CSS code in element- style=”resize:none”
Output: See GIF with and without resize option TextArea box.
Attributes | Important
Below is Addtional HTML textarea attributes, which you can use in TextArea Input Tag.
| Attribute | Value | Description |
|---|---|---|
| autofocus | autofocus | Specifies that a text area should automatically get focus when the page loads |
| cols | number | Specifies the visible width of a text area |
| dirname | textareaname.dir | Specifies that the text direction of the textarea will be submitted |
| disabled | disabled | Specifies that a text area should be disabled |
| form | form_id | Specifies one or more forms the text area belongs to |
| maxlength | number | Specifies the maximum number of characters allowed in the text area |
| name | text | Specifies a name for a text area |
| placeholder | text | Specifies a short hint that describes the expected value of a text area |
| readonly | readonly | Specifies that a text area should be read-only |
| required | required | Specifies that a text area is required/must be filled out |
| rows | number | Specifies the visible number of lines in a text area |
| wrap | hardsoft | Specifies how the text in a text area is to be wrapped when submitted in a form |
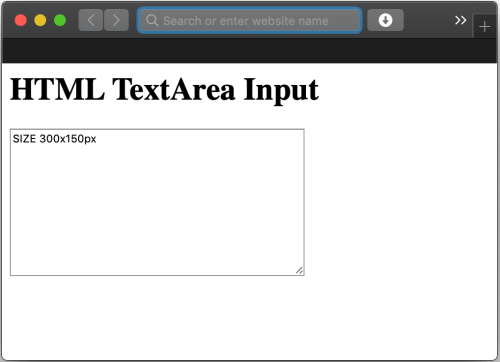
HTML Textarea Width and Height | How to
To set an HTML TextArea Height and Width you can use cols and rows attributes with CSS code or else only use CSS.
See the below example of it. Using inline CSS style.
Output:
So you now understand the why HTML TextArea Required in Web App. If you have any doubt and suggestion. Then comment on it.
с фиксированным размером (no resize textarea)
По умолчанию пользователь может изменять размер текстовой области <textarea> (растягивать область ввода за край).
Для того, чтобы запретить изменение размера <textarea> используйте CSS свойство resize. Значение none поставит запрет на изменение размеров текстовой области, как ширины, так и высоты.
Если необходимо, чтобы у textarea была фиксированная ширина, установите значение у CSS свойства resize в vertical, при этом высоту области можно будет изменить. Если нужно иметь возможность изменять ширину <textarea> при фиксированной высоте, используйте значения horizontal.
Отображение в браузере:
HTML код <textarea> с фиксированной шириной и высотой
HTML Теги
<!—…—><!DOCTYPE><a><abbr><acronym><address><applet><area><article><aside><audio><b><base><basefont><bdi><bdo><big><blockquote><body><br><button><canvas><caption><center><cite><code><col><colgroup><data><datalist><dd><del><details><dfn><dialog><dir><div><dl><dt><em><embed><fieldset><figcaption><figure><font><footer><form><frame><frameset><h1> — <h6><head><header><hr><html><i><iframe><img><input><ins><kbd><label><legend><li><link><main><map><mark><meta><meter><nav><noframes><noscript><object><ol><optgroup><option><output><p><param><picture><pre><progress><q><rp><rt><ruby><s><samp><script><section><select><small><source><span><strike><strong><style><sub><summary><sup><svg><table><tbody><td><template><textarea><tfoot><th><thead><time><title><tr><track><tt><u><ul><var><video>
JavaScript
JS Array
concat()
constructor
copyWithin()
entries()
every()
fill()
filter()
find()
findIndex()
forEach()
from()
includes()
indexOf()
isArray()
join()
keys()
length
lastIndexOf()
map()
pop()
prototype
push()
reduce()
reduceRight()
reverse()
shift()
slice()
some()
sort()
splice()
toString()
unshift()
valueOf()
JS Boolean
constructor
prototype
toString()
valueOf()
JS Classes
constructor()
extends
static
super
JS Date
constructor
getDate()
getDay()
getFullYear()
getHours()
getMilliseconds()
getMinutes()
getMonth()
getSeconds()
getTime()
getTimezoneOffset()
getUTCDate()
getUTCDay()
getUTCFullYear()
getUTCHours()
getUTCMilliseconds()
getUTCMinutes()
getUTCMonth()
getUTCSeconds()
now()
parse()
prototype
setDate()
setFullYear()
setHours()
setMilliseconds()
setMinutes()
setMonth()
setSeconds()
setTime()
setUTCDate()
setUTCFullYear()
setUTCHours()
setUTCMilliseconds()
setUTCMinutes()
setUTCMonth()
setUTCSeconds()
toDateString()
toISOString()
toJSON()
toLocaleDateString()
toLocaleTimeString()
toLocaleString()
toString()
toTimeString()
toUTCString()
UTC()
valueOf()
JS Error
name
message
JS Global
decodeURI()
decodeURIComponent()
encodeURI()
encodeURIComponent()
escape()
eval()
Infinity
isFinite()
isNaN()
NaN
Number()
parseFloat()
parseInt()
String()
undefined
unescape()
JS JSON
parse()
stringify()
JS Math
abs()
acos()
acosh()
asin()
asinh()
atan()
atan2()
atanh()
cbrt()
ceil()
clz32()
cos()
cosh()
E
exp()
expm1()
floor()
fround()
LN2
LN10
log()
log10()
log1p()
log2()
LOG2E
LOG10E
max()
min()
PI
pow()
random()
round()
sign()
sin()
sqrt()
SQRT1_2
SQRT2
tan()
tanh()
trunc()
JS Number
constructor
isFinite()
isInteger()
isNaN()
isSafeInteger()
MAX_VALUE
MIN_VALUE
NEGATIVE_INFINITY
NaN
POSITIVE_INFINITY
prototype
toExponential()
toFixed()
toLocaleString()
toPrecision()
toString()
valueOf()
JS OperatorsJS RegExp
constructor
compile()
exec()
g
global
i
ignoreCase
lastIndex
m
multiline
n+
n*
n?
n{X}
n{X,Y}
n{X,}
n$
^n
?=n
?!n
source
test()
toString()
(x|y)
.
\w
\W
\d
\D
\s
\S
\b
\B
\0
\n
\f
\r
\t
\v
\xxx
\xdd
\uxxxx
JS Statements
break
class
continue
debugger
do…while
for
for…in
for…of
function
if…else
return
switch
throw
try…catch
var
while
JS String
charAt()
charCodeAt()
concat()
constructor
endsWith()
fromCharCode()
includes()
indexOf()
lastIndexOf()
length
localeCompare()
match()
prototype
repeat()
replace()
search()
slice()
split()
startsWith()
substr()
substring()
toLocaleLowerCase()
toLocaleUpperCase()
toLowerCase()
toString()
toUpperCase()
trim()
valueOf()
Create CSS Variables for Theming#
For the tutorial, we’re going to try a bit different technique for theming by using values.
We’ll set a grey for the border, and then break down a blue color to be used in our state into its hsl values, including: for «hue», for «saturation», and for «lightness».
Accessible Contrast
As per all user interface elements, the input border needs to have at least 3:1 contrast against it’s surroundings.
And, the state needs to have 3:1 contrast against the unfocused state if it involves something like changing the border color or, according to , a thickness greater than or equal to .
makes some slight adjustments to requirements, and I encourage you to review them.
readonly CSS Style#
While not in use often, the attribute prevents additional user input, although the value can be selected, and it is still discoverable by assistive tech.
Let’s add some styles to enable more of a hint that this field is essentially a placeholder for a previously entered value.
To do this, we’ll target any that also has the attriute. Attribute selectors are a very handy method with wide application, and definitely worth adding to (or updating your awareness of) in your CSS toolbox.
In addition to swapping for a border, we’ve also assigned it the cursor and enforced a medium-grey text color.
As seen in the following gif, the user cannot interact with the field except to highlight/copy the value.
:focus State Styles#
Ok, we’ve completed the initial styles for our inputs and the textarea, but we need to handle for a very important state: .
We’re going to go for a combo effect that changes the border color to a value that meets 3:1 contrast against the unfocused state, but also adds a for a bit of extra highlighting.
And here’s why we defined our theme color of the focus state in hsl: it means we can create a variant of the border color by updating just the lightness value.
First, we define the border color by constructing the full hsl value from the individual CSS variable values:
Then, we add in the which will only use blur to create essentially a double-border effect. is acceptable to use inside , so we use it to lighten the original value by 40%, and also allow just a bit of alpha transparency:
Note that we’ve now added a new context for our contrast, which is the border vs. the , so ensure the computed difference for your chosen colors is at least 3:1 if using this method.
Optionally, jump back up to the rule and add a to animate the :
Finally, we don’t want to forget Windows High Contrast mode which will not see the or be able to detect the border color change. So, we include a transparent outline for those users:
Here’s a gif demo of focusing into the text input:
And here’s the appearance for the field, since it has a different :

In the CodePen HTML, there is a comment with an example of using an inline style to define an updated visual such as for an error state. Again, keep in mind that we are lightening the provided value by 40%, and the focused border color must be at least 3:1 contrast against the unfocused color, so consider that when you alter the CSS variable values.
HTML5 Textarea Attributes
HTML5 introduced a few new attributes which can be used with textarea elements. Here are some of the most important:
- : Associates the textarea with a form. Use the ID attribute of the form as the value for the textarea form attributes. This allows you to place a textarea anywhere on a webpage, even outside of the form element, and still have the contents of the textarea included when the form is submitted.
- and : Used to specify a minimum or maximum number of characters that may be entered into a textarea.
- : Adds placeholder text to the textarea that disappears as soon as a user places the cursor inside of the element.
- : Requires that the textarea contain content prior to allowing form submission.
- : Specifies whether or not hard-returns should be added to the content submitted in a textarea.
HTML Textarea Form Element:
Please limit your response to 100 characters.Please limit your response to 200 characters.Please limit your response to 500 characters.
As you may have noticed, the attributes cols (columns) and rows control the rendered size of the textarea. These constraints only impact how the textarea is rendered visually, and in no way do they limit the maximum number of characters a user can place inside the textarea. In fact, if you fill up the fields above with text, the fields will just continue to grow as you type and you will be able to scroll up and down as you please. Limits must be set with JavaScript and/or a server-side scripting language such as PHP.
HTML — Textarea Wrap
The wrap attribute refers to how the user input reacts when it reaches the end of each row in the text field. Wrapping can be defined using one of three values:
- soft
- hard
- off
«Soft» forces the words to wrap once inside the textarea but once the form is submitted, the words will no longer appear as such, and line breaks and spacing are not maintained.
«Hard» wraps the words inside the text box and places line breaks at the end of each line so that when the form is submitted the text will transfer as it appears in the field, including line breaks and spacing.
«Off» sets a textarea to ignore all wrapping and places the text into one ongoing line.
HTML Text Area Word Wrap Code:
<textarea cols="20" rows="5" >
 As you can see many times word wrapping is often the desired look for your textareas. Since it makes everything nice and easy to read and preserves line breaks.
</textarea>
HTML Text Area Word Wrap:
As you can see many times word wrapping is often the desired look for your text areas. Since it makes everything nice and easy to read.
Here’s a textarea with no word wrapping at all!
HTML Text Area No Word Wrap:
<textarea cols="20" rows="5" >
As you can see many times word wrapping is often the desired look for your textareas. Since it makes everything nice and easy to read. </textarea>
HTML Text Area No Word Wrap:
As you can see many times word wrapping is often the desired look for your text areas. Since it makes everything nice and easy to read.
HTML — Text Areas: Readonly
Setting a «yes» or «no» value for the readonly attribute determines whether or not a viewer has permission to manipulate the text inside the text field.
HTML Readonly Attribute:
<textarea cols="20" rows="5" wrap="hard" >
As you can see many times word wrapping is often the desired look for your text areas. Since it makes everything nice and easy to read.
</textarea>
HTML Read Only Text Areas:
As you can see many times word wrapping is often the desired look for your text areas. Since it makes everything nice and easy to read.
This read-only behavior allows a web surfer to see and highlight the text inside the element, but he or she cannot alter it in any way. When highlighted, the user may also Copy (Ctrl + C on a PC, Ctrl-Click on a Mac) the text to local clipboard and paste it anywhere he/she pleases.
HTML — Text Areas: Disabled
Disabling the textarea altogether prevents the surfer from highlighting, copying, or modifying the field in any way. To accomplish this, set the disabled property to «yes».
HTML Code:
<textarea cols="20" rows="5" wrap="hard" >
As you can see many times word wrapping is often the desired look for your text areas. Since it makes everything nice and easy to read.</textarea>
Disabled Textareas:
As you can see many times word wrapping is often the desired look for your text areas. Since it makes everything nice and easy to read.
Keep in mind that just because users are unable to copy from the screen directly doesn’t prevent them from taking a screen capture or extracting the data from the source code. Disabling the textarea offers no security whatsoever.
- Continue
Textarea Object Properties
| Property | Description |
|---|---|
| autofocus | Sets or returns whether a text area should automatically get focus when the page loads |
| cols | Sets or returns the value of the cols attribute of a text area |
| defaultValue | Sets or returns the default value of a text area |
| disabled | Sets or returns whether the text area is disabled, or not |
| form | Returns a reference to the form that contains the text area |
| maxLength | Sets or returns the value of the maxlength attribute of a text area |
| name | Sets or returns the value of the name attribute of a text area |
| placeholder | Sets or returns the value of the placeholder attribute of a text area |
| readOnly | Sets or returns whether the contents of a text area is read-only |
| required | Sets or returns whether the text area must be filled out before submitting a form |
| rows | Sets or returns the value of the rows attribute of a text area |
| type | Returns the type of the form element the text area is |
| value | Sets or returns the contents of a text area |
| wrap | Sets or returns the value of the wrap attribute of a text area |