Html text align
Содержание:
- Property Values
- Определение и применение
- Центрирование по вертикали
- Используем свойства Grid-модели
- Декорирование текста
- CSS horizontal align
- How to Center Both Vertically and Horizontally
- Выравнивание текста с помощью CSS
- Выравнивание по вертикали
- How to Center Horizontally
- Выравнивание по горизонтальному центру блочных (block) элементов с помощью margin: auto
- CSS Справочники
- CSS Свойства
- CSS Свойства
- CSS Reference
- CSS Properties
- Параметры тени у текста — свойство text-shadow
Property Values
| Value | Description | Play it |
|---|---|---|
| auto | Default value. The last line is justified and aligned left | Play it » |
| left | The last line is aligned to the left | Play it » |
| right | The last line is aligned to the right | Play it » |
| center | The last line is center-aligned | Play it » |
| justify | The last line is justified as the rest of the lines | Play it » |
| start | The last line is aligned at the beginning of the line (left if the text-direction is left-to-right, and right is the text-direction is right-to-left) | Play it » |
| end | The last line is aligned at the end of the line (right if the text-direction is left-to-right, and left is the text-direction is right-to-left) | Play it » |
| initial | Sets this property to its default value. Read about initial | Play it » |
| inherit | Inherits this property from its parent element. Read about inherit |
Определение и применение
CSS свойство align-content определяет как браузер распределяет пространство между и вокруг флекс элементов вдоль поперечной оси контейнера (вертикально), или производит выравнивание всего макета сетки по оси столбца grid-контейнера.
Для того, чтобы определить как браузер распределяет пространство между и вокруг флекс элементов вдоль главной оси контейнера (горизонтально), или производит выравнивание всего макета сетки по оси строки grid-контейнера, вы можете воспользоваться свойством justify-content.
При работе с флекс элементами обратите внимание на то, что свойство align-content возможно применить только к многострочным флекс контейнерам (flex-wrap, или flex-flow со значениями wrap | wrap-reverse). Если элемент не является флекс элементом, или элементом сетки макета (не находится внутри родительского элемента, который является блочным, или строчным флекс, или grid-контейнером), то свойство align-content не окажет на такой элемент никакого эффекта
Если элемент не является флекс элементом, или элементом сетки макета (не находится внутри родительского элемента, который является блочным, или строчным флекс, или grid-контейнером), то свойство align-content не окажет на такой элемент никакого эффекта.
Более подробную информацию о работе с флекс элементами вы можете получить в статье учебника CSS «Верстка по Flexbox (работа с контейнерами)».
Схематичное отображение работы свойства align-content отображено на следующем изображении:
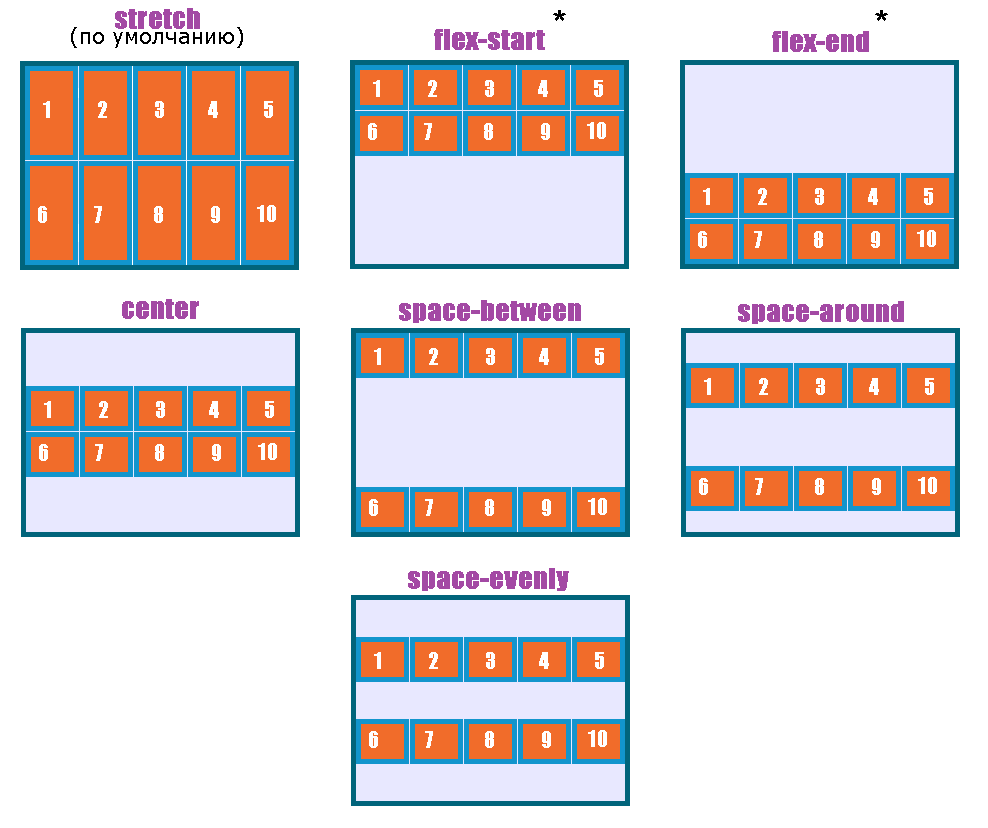
* — для элементов сетки макета (grid-элементы) допускается использование сокращенных значений start и end, для флекс элементов необходимо использовать полные значения flex-start и flex-end.
Центрирование по вертикали
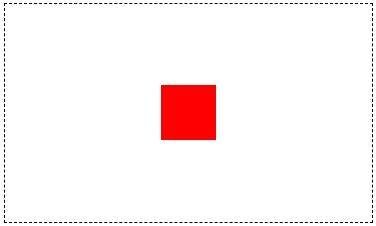
Одним из способов показать посетителю направленность и название сайта является
использование сплэш-страницы. Это первая страница, на которой, как правило,
расположена flash-заставка или рисунок, выражающий главную идею сайта. Изображение
также является и ссылкой на остальные разделы сайта. Требуется поместить этот
рисунок по центру окна браузера вне зависимости от разрешения монитора. Для
этой цели можно воспользоваться таблицей с шириной и высотой равной 100% (пример 1).
Пример 1. Центрирование рисунка
В данном примере выравнивание по горизонтали устанавливается с помощью параметра
align=»center» тега <td>,
а по вертикали содержимое ячейки можно не центрировать, поскольку это положение
задано по умолчанию.
Чтобы высота таблицы устанавливалась как 100%, необходимо убрать <!DOCTYPE>, код при этом перестает быть валидным.
Использование ширины и высоты на всю доступную область веб-страницы гарантирует,
что содержимое таблицы будет выравниваться строго по центру окна браузера, независимо
от его размеров.
Используем свойства Grid-модели
Относительно новая система верстки Grid-модель также предоставляет набор свойств для центрирования контента в блоке не только по горизонтали, но и по вертикали. В примере ниже свойства очень похожи на те, что мы рассматривали для Flexbox-модели.
CSS
.banner{
display: grid;
justify-items: center;
align-items: center;
}
|
1 2 3 4 5 |
.banner{ displaygrid; justify-itemscenter; align-itemscenter; } |
Практический пример с баннером:
See the Pen Grid centered banner by Elen (@ambassador) on CodePen.dark
Можно заменить свойства одним , которое обеспечивает горизонтальное и вертикальное центрирование элементов.
Центрирование с помощью Grid
.banner{
display: grid;
place-items: center;
}
|
1 2 3 4 |
.banner{ displaygrid; place-itemscenter; } |
See the Pen Centered Grid property place-items: center by Elen (@ambassador) on CodePen.dark
Просмотров:
248
Декорирование текста
Значение свойства text-decoration позволяет сделать текст зачёркнутым (line-through), подчёркнутым (underline) — линия появляется под текстом, надчёркнутым (overline) — линия появляется над текстом, или отменить эффекты (none).
Вот пример кода:
<!DOCTYPE html>
<html>
<head>
    <title>text-decoration</title>
</head>
<body>
<p style="text-decoration: line-through;">Это зачёркнутый текст.</p>
<p style="text-decoration: underline;">Это подчёркнутый текст.</p>
<p style="text-decoration: overline;">Это надчёркнутый текст.</p>
</body>
</html>
Результатом работы будет такая страница:
CSS horizontal align
Aligning inline elements
and text are the easiest to align. You can do that by using the text-align property:
Example Copy
This property can take one of six possible values:
| Value | Syntax | Description |
|---|---|---|
| The default value. Makes CSS center the element in the container | ||
| Makes CSS align the element at the left side of the container | ||
| Makes CSS align the element at the right side of the container | ||
| Makes CSS space the content to fill the container from edge to edge | ||
| Works like when the text direction is left-to-right and like when it’s right-to-left | ||
| Works like when the text direction is left-to-right and like when it’s right-to-left |
Using margins for block elements
To make CSS center or otherwise align a , set both its left and right margins to . See how to center div elements in the example below:
Example Copy
To be able to do the same to any element, you can apply a property with its value set to to it. For example, to center an image horizontally, you would follow the example below:
Example Copy
Modifying position
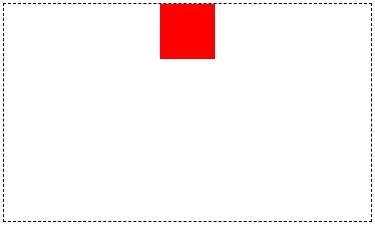
If you only have one element in the container, you can also align it horizontally by using the position property. If you define the value, the position will be fixed, which means that the element may overlap other elements to keep its particular place when a user resizes the window or scrolls:
Example Copy
Making elements float
You can also align elements using the property:
Example Copy
The property is different from absolute position in two aspects. First, it places an element on the specified side of the container so that text and other inline elements can wrap around it.
Secondly, the floated element is removed from the normal flow of the page. However, it does remain a part of the flow in a sense that other elements don’t ignore it completely (which they do for absolutely positioned elements).
When you float an image or another element that has a bigger height than its container, such element overflows the boundaries of the container. You can prevent this by applying the overflow property with its value set to :
Example Copy
How to Center Both Vertically and Horizontally
This is very similar to the method above to center an element vertically. Like last time, you must know the width and height of the element you want to center.
Set the property of the parent element to .
Then set the child’s property to , to , and to . This just centers the top left corner of the child element vertically and horizontally.
To truly center the child element, apply a negative top margin set to half the child element’s height, and a negative left margin set to half the child element’s width:

How to Center a Div Vertically and Horizontally with Transform and Translate
Use this method to center an element vertically and horizontally if you don’t know its exact dimensions and can’t use Flexbox.
First, set the property of the parent element to .
Next, set the child element’s property to , to , and to .
Finally, use to truly center the child element:
How to Center a Div Vertically and Horizontally with Flexbox
Flexbox is the easiest way to center an element both vertically and horizontally.
This is really just a combination of the two previous Flexbox methods. Then apply and to center the child element(s) horizontally and vertically:

That’s everything you need to know to center with the best of ’em. Now go forth and center all the things.
Выравнивание текста с помощью CSS
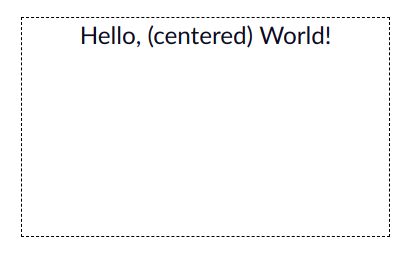
Начнем с атрибутов стиля, управляющих выводом текста в блочных элементах. Начнем со свойства text-align, которое является фактически заменой атрибута align (используется для выравнивания содержимого html-элементов, например абзацев p).
Свойство стиля text-align задает горизонтальное выравнивание текста и имеет всего четыре возможных значения:
Доступные значения этого правила определяют выравнивание, соответственно: left — по левому краю, right — по правому краю, center — по центру и justify — по ширине страницы (одновременно по левому и правому краю за счет увеличения расстояния между словами). Для примера, текст этой статьи выравнен по ширине страницы (если вы заметили у него ровные границы и слева и справа) с помощью правила text-align:justify.
По умолчанию, горизонтальное выравнивание выполняется по левому краю, поэтому специально указывать text-align:left не обязательно, если в родительских элементах не было указано другого выравнивания.
Примеры использования свойства:
Следующее свойство CSS text-ident задает отступ для красной строки, например для текста в теге абзаца p. Это правило также, как и text-align, применимо только для блочных элементов. Синтаксис:
Здесь допускаются абсолютные и относительные величины отступа. Абсолютные значения (px — пикселы, em, ex и др.) можно указывать как со знаком плюс, так и со знаком минус. Относительная величина обычно задается в процентах (%). Относительное значение рассчитывается от ширины области, которая отведена под текст. Так, css правило text-indent:50% задаст красную строку равную половине длины этой самой строки. По умолчанию отступ «красной строки» равен нулю. Пример:
Далее рассмотрим вертикальное выравнивание — свойство vertical-align. Это свойство применимо уже для всех html элементов и практически для всех означает выравнивание между собой строчных элементов с текстом относительно их базовой линии. Кроме тегов таблицы td и th, в которых по вертикали будет выравниваться весь контент. Синтаксис:
Рассмотрим каждое значение подробнее:
- baseline — выравнивание фрагмента текста по базовой линии родительского элемента. Это значение по умолчанию;
- sub — фрагмент текста изображается в виде нижнего индекса или подстрочным для родительского элемента;
- super — фрагмент текста изображается в виде верхнего индекса или надстрочным для родительского элемента;
- top — выравнивание фрагмента текста по верхнему краю родительского элемента;
- text-top — выравнивание фрагмента по верхнему краю текста родительского элемента;
- middle — выравнивание центра фрагмента текста по центру родительского элемента;
- bottom — выравнивание фрагмента текста по нижнему краю родительского элемента;
- text-bottom — выравнивание фрагмента по нижнему краю текста родительского элемента;
На рисунке ниже можно посмотреть поведение фрагментов теста при различных значениях свойства vertical-align в браузере Internet Explorer 11:
Кроме вышеперечисленных значений, можно указывать числовые значения. Так, правило CSS vertical-align:0 будет означать тоже самое, что и запись vertical-align:baseline. А правило vertical-align:10px будет смещать текст вверх на 10 пикселей относительно базовой линии. Для смещения текста вниз значение необходимо указывать с минусом.
Сдвиг также можно задавать в относительных единицах измерения, например в em и в ex или в процентах.
Для вертикального выравнивания содержимого ячеек таблицы в vertical-align следует использовать значения:
- top — для выравнивания содержимого по верхней границе ячейки;
- bottom — для выравнивания содержимого по нижней границе ячейки;
- middle — для выравнивания по центру ячейки (используется по умолчанию).
Для достижения нужного результата, обычно приходится экспериментировать с различными значениями свойства стиля vertical-align. Многочисленные возможные значения дают слишком разный результат в различных случаях.
Выравнивание по вертикали
Может задаваться только для строчных элементов (картинок, форм), определяется свойством vertical-align. С его помощью выравнивается не содержимое, а сами элементы, кроме случая с ячейкой – использование vertical-align выравнивает не её саму, а только расположенный в ней текст. Значения могут быть следующими:
- baseline. задаётся свойству по умолчанию и выравнивает базовую линию элемента по базовой линии родителя. Если у родителя её нет, то выравнивание происходит по нижней границе.
- top и bottom. Если задано первое значение, то верхний край элемента будет совпадать с верхним краем самого высокого элемента строки. Можно сказать, что top — это выравнивание по верхнему краю. Второе свойство выполняет противоположную функцию — совмещает нижний край оформляемого элемента с нижней частью элемента, расположенного в строке ниже всех, то есть происходит выравнивание по нижнему краю.
- text-top и text-bottom. От предыдущих свойств отличаются тем, что выравнивание происходит по самым нижним и верхним текстовым элементам, а не любым.
- sub и super. Аналоги HTML-тегов <sub> и <sup>. Первое свойство делает элемент подстрочным, второе — надстрочным. Шрифт текста при этом не меняется.
- middle. Выравнивание по центру относительно элемента-родителя.
Также с помощью vertical-align можно переместить элемент вверх или вниз, указав значение в пикселях, единицах или процентах. Положительная цифра переместит его вверх, отрицательная — вниз.
How to Center Horizontally
Centering elements horizontally is generally easier than vertically centering them. Here are some common elements you may want to center horizontally and different ways to do it.
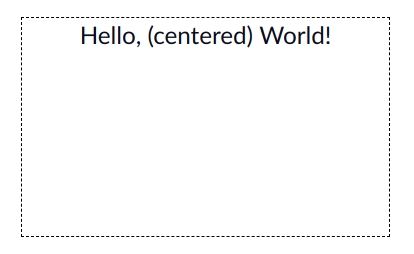
To center text or links horizontally, just use the property with the value :
Use the shorthand property with the value to center block-level elements like a horizontally:

How to Center a Div Horizontally with Flexbox
Flexbox is the most modern way to center things on the page, and makes designing responsive layouts much easier than it used to be. However, it’s not fully supported in some legacy browsers like Internet Explorer.
To center an element horizontally with Flexbox, just apply and to the parent element:
Выравнивание по горизонтальному центру блочных (block) элементов с помощью margin: auto
В том случае, если нам нужно центрировать блочный элемент относительно страницы, то тут тоже есть давно работающий метод, который предполагает указание ширины элемента и , например, так форматируется большая часть контейнеров:
.container {
width: 90%;
max-width: 1200px;
padding-left: 15px;
padding-right: 15px;
margin: auto;
}
|
1 2 3 4 5 6 7 |
.container{ width90%; max-width1200px; padding-left15px; padding-right15px; marginauto; } |
Вариации кода могут быть разными, но принцип понятен, я думаю. Можно разместить простую форму посередине ее родительского элемента. Поскольку тег относится к блочным, то сработает для него в качестве центрирующего правила при заданной ширине (свойство ):
Центрируем форму за счет margin: auto
<style>
#center-form {
width: 350px;
height: 200px;
padding: 20px;
border: 3px double #1e8cbe;
border-radius: 12px;
margin: 20px auto;
}
</style>
<div class=»test»>
<form id=»center-form»>
<p><input name=»login» type=»text» placeholder=»Логин»></p>
<p><input name=»login» type=»password» placeholder=»Пароль»></p>
<button class=»button»>Войти</button>
</form>
</div>
|
1 2 3 4 5 6 7 8 9 10 11 12 13 14 15 16 17 |
<style> #center-form { width350px; height200px; padding20px; border3pxdouble#1e8cbe; border-radius12px; margin20pxauto; } <div class=»test»> <form id=»center-form»> <p><input name=»login»type=»text»placeholder=»Логин»><p> <p><input name=»login»type=»password»placeholder=»Пароль»><p> <button class=»button»>Войти<button> <form> <div> |
Смотрим на результат:
Свойство или , как в стилях для формы, или 2 свойства: +, заданные для блочного элемента с определенной шириной, сообщают браузеру, что тот должен самостоятельно рассчитать отступы слева и справа таким образом, чтобы они были одинаковыми. Браузеру сделать это несложно, т.к. ему всегда известна ширина открытого на данный момент окна, поэтому вычесть из нее ширину блочного элемента и разделить полученное значение на 2 для браузера пара пустяков.
CSS Справочники
CSS СправочникCSS ПоддержкаCSS СелекторыCSS ФункцииCSS ЗвукCSS Веб шрифтыCSS АнимацииCSS ДлиныCSS Конвертер px-emCSS Названия цветаCSS Значения цветаCSS по умолчаниюCSS Символы
CSS Свойства
align-content
align-items
align-self
all
animation
animation-delay
animation-direction
animation-duration
animation-fill-mode
animation-iteration-count
animation-name
animation-play-state
animation-timing-function
backface-visibility
background
background-attachment
background-blend-mode
background-clip
background-color
background-image
background-origin
background-position
background-repeat
background-size
border
border-bottom
border-bottom-color
border-bottom-left-radius
border-bottom-right-radius
border-bottom-style
border-bottom-width
border-collapse
border-color
border-image
border-image-outset
border-image-repeat
border-image-slice
border-image-source
border-image-width
border-left
border-left-color
border-left-style
border-left-width
border-radius
border-right
border-right-color
border-right-style
border-right-width
border-spacing
border-style
border-top
border-top-color
border-top-left-radius
border-top-right-radius
border-top-style
border-top-width
border-width
bottom
box-decoration-break
box-shadow
box-sizing
caption-side
caret-color
@charset
clear
clip
color
column-count
column-fill
column-gap
column-rule
column-rule-color
column-rule-style
column-rule-width
column-span
column-width
columns
content
counter-increment
counter-reset
cursor
direction
display
empty-cells
filter
flex
flex-basis
flex-direction
flex-flow
flex-grow
flex-shrink
flex-wrap
float
font
@font-face
font-family
font-kerning
font-size
font-size-adjust
font-stretch
font-style
font-variant
font-weight
grid
grid-area
grid-auto-columns
grid-auto-flow
grid-auto-rows
grid-column
grid-column-end
grid-column-gap
grid-column-start
grid-gap
grid-row
grid-row-end
grid-row-gap
grid-row-start
grid-template
grid-template-areas
grid-template-columns
grid-template-rows
hanging-punctuation
height
hyphens
@import
isolation
justify-content
@keyframes
left
letter-spacing
line-height
list-style
list-style-image
list-style-position
list-style-type
margin
margin-bottom
margin-left
margin-right
margin-top
max-height
max-width
@media
min-height
min-width
mix-blend-mode
object-fit
object-position
opacity
order
outline
outline-color
outline-offset
outline-style
outline-width
overflow
overflow-x
overflow-y
padding
padding-bottom
padding-left
padding-right
padding-top
page-break-after
page-break-before
page-break-inside
perspective
perspective-origin
pointer-events
position
quotes
resize
right
tab-size
table-layout
text-align
text-align-last
text-decoration
text-decoration-color
text-decoration-line
text-decoration-style
text-indent
text-justify
text-overflow
text-shadow
text-transform
top
transform
transform-origin
transform-style
transition
transition-delay
transition-duration
transition-property
transition-timing-function
unicode-bidi
user-select
vertical-align
visibility
white-space
width
word-break
word-spacing
word-wrap
writing-mode
z-index
CSS Свойства
align-contentalign-itemsalign-selfallanimationanimation-delayanimation-directionanimation-durationanimation-fill-modeanimation-iteration-countanimation-nameanimation-play-stateanimation-timing-functionbackface-visibilitybackgroundbackground-attachmentbackground-blend-modebackground-clipbackground-colorbackground-imagebackground-originbackground-positionbackground-repeatbackground-sizeborderborder-bottomborder-bottom-colorborder-bottom-left-radiusborder-bottom-right-radiusborder-bottom-styleborder-bottom-widthborder-collapseborder-colorborder-imageborder-image-outsetborder-image-repeatborder-image-sliceborder-image-sourceborder-image-widthborder-leftborder-left-colorborder-left-styleborder-left-widthborder-radiusborder-rightborder-right-colorborder-right-styleborder-right-widthborder-spacingborder-styleborder-topborder-top-colorborder-top-left-radiusborder-top-right-radiusborder-top-styleborder-top-widthborder-widthbottombox-decoration-breakbox-shadowbox-sizingcaption-sidecaret-color@charsetclearclipcolorcolumn-countcolumn-fillcolumn-gapcolumn-rulecolumn-rule-colorcolumn-rule-stylecolumn-rule-widthcolumn-spancolumn-widthcolumnscontentcounter-incrementcounter-resetcursordirectiondisplayempty-cellsfilterflexflex-basisflex-directionflex-flowflex-growflex-shrinkflex-wrapfloatfont@font-facefont-familyfont-kerningfont-sizefont-size-adjustfont-stretchfont-stylefont-variantfont-weightgridgrid-areagrid-auto-columnsgrid-auto-flowgrid-auto-rowsgrid-columngrid-column-endgrid-column-gapgrid-column-startgrid-gapgrid-rowgrid-row-endgrid-row-gapgrid-row-startgrid-templategrid-template-areasgrid-template-columnsgrid-template-rowshanging-punctuationheighthyphens@importisolationjustify-content@keyframesleftletter-spacingline-heightlist-stylelist-style-imagelist-style-positionlist-style-typemarginmargin-bottommargin-leftmargin-rightmargin-topmax-heightmax-width@mediamin-heightmin-widthmix-blend-modeobject-fitobject-positionopacityorderoutlineoutline-coloroutline-offsetoutline-styleoutline-widthoverflowoverflow-xoverflow-ypaddingpadding-bottompadding-leftpadding-rightpadding-toppage-break-afterpage-break-beforepage-break-insideperspectiveperspective-originpointer-eventspositionquotesresizerighttab-sizetable-layouttext-aligntext-align-lasttext-decorationtext-decoration-colortext-decoration-linetext-decoration-styletext-indenttext-justifytext-overflowtext-shadowtext-transformtoptransformtransform-origintransform-styletransitiontransition-delaytransition-durationtransition-propertytransition-timing-functionunicode-bidiuser-selectvertical-alignvisibilitywhite-spacewidthword-breakword-spacingword-wrapwriting-modez-index
CSS Reference
CSS ReferenceCSS Browser SupportCSS SelectorsCSS FunctionsCSS Reference AuralCSS Web Safe FontsCSS Font FallbacksCSS AnimatableCSS UnitsCSS PX-EM ConverterCSS ColorsCSS Color ValuesCSS Default ValuesCSS Entities
CSS Properties
align-content
align-items
align-self
all
animation
animation-delay
animation-direction
animation-duration
animation-fill-mode
animation-iteration-count
animation-name
animation-play-state
animation-timing-function
backface-visibility
background
background-attachment
background-blend-mode
background-clip
background-color
background-image
background-origin
background-position
background-repeat
background-size
border
border-bottom
border-bottom-color
border-bottom-left-radius
border-bottom-right-radius
border-bottom-style
border-bottom-width
border-collapse
border-color
border-image
border-image-outset
border-image-repeat
border-image-slice
border-image-source
border-image-width
border-left
border-left-color
border-left-style
border-left-width
border-radius
border-right
border-right-color
border-right-style
border-right-width
border-spacing
border-style
border-top
border-top-color
border-top-left-radius
border-top-right-radius
border-top-style
border-top-width
border-width
bottom
box-decoration-break
box-shadow
box-sizing
break-after
break-before
break-inside
caption-side
caret-color
@charset
clear
clip
clip-path
color
column-count
column-fill
column-gap
column-rule
column-rule-color
column-rule-style
column-rule-width
column-span
column-width
columns
content
counter-increment
counter-reset
cursor
direction
display
empty-cells
filter
flex
flex-basis
flex-direction
flex-flow
flex-grow
flex-shrink
flex-wrap
float
font
@font-face
font-family
font-feature-settings
font-kerning
font-size
font-size-adjust
font-stretch
font-style
font-variant
font-variant-caps
font-weight
gap
grid
grid-area
grid-auto-columns
grid-auto-flow
grid-auto-rows
grid-column
grid-column-end
grid-column-gap
grid-column-start
grid-gap
grid-row
grid-row-end
grid-row-gap
grid-row-start
grid-template
grid-template-areas
grid-template-columns
grid-template-rows
hanging-punctuation
height
hyphens
@import
isolation
justify-content
@keyframes
left
letter-spacing
line-height
list-style
list-style-image
list-style-position
list-style-type
margin
margin-bottom
margin-left
margin-right
margin-top
max-height
max-width
@media
min-height
min-width
mix-blend-mode
object-fit
object-position
opacity
order
outline
outline-color
outline-offset
outline-style
outline-width
overflow
overflow-x
overflow-y
padding
padding-bottom
padding-left
padding-right
padding-top
page-break-after
page-break-before
page-break-inside
perspective
perspective-origin
pointer-events
position
quotes
resize
right
row-gap
scroll-behavior
tab-size
table-layout
text-align
text-align-last
text-decoration
text-decoration-color
text-decoration-line
text-decoration-style
text-indent
text-justify
text-overflow
text-shadow
text-transform
top
transform
transform-origin
transform-style
transition
transition-delay
transition-duration
transition-property
transition-timing-function
unicode-bidi
user-select
vertical-align
visibility
white-space
width
word-break
word-spacing
word-wrap
writing-mode
z-index
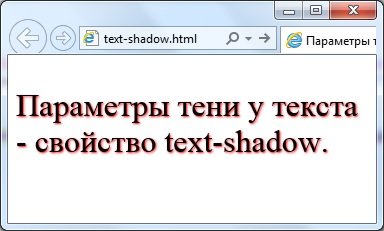
Параметры тени у текста — свойство text-shadow
Для любителей различных украшательств в стандарте CSS3 появилась возможность задавать тень у текста. Грамотное использования свойства text-shadow позволяет заметно оживить web страницу. Синтаксис:

Значение none отменяет добавление тени у текста и установлено по умолчанию.
Цвет тени задается в любом доступном CSS формате и является не обязательным параметром. По умолчанию цвет тени совпадает с цветом текста.
Горизонтальное смещение тени можно задавать в любой единице измерения поддерживаемой CSS. При положительном значении тень будет располагаться правее текста, при отрицательном — левее. Нулевое значение расположит тень прямо под текстом и имеет смысл только если задано размытие тени.
Вертикальное смещение тени тоже можно задавать в любой единице измерения поддерживаемой CSS. При положительном значении тень будет смещаться ниже текста, при отрицательном — выше. Нулевое значение расположит тень прямо под текстом.
В любой единице измерения задается и радиус размытия тени. Чем больше это значение, тем шире становится тень и сильнее сглаживается. Если этот параметр не установлен, то значение размытие предполагается равным нулю. Так как алгоритм сглаживания обычно у разных браузеров отличается, то и вид тени может несколько отличаться в зависимости от браузера.
Рассмотрим пример:
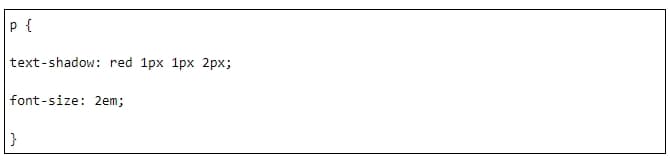
И вот так будет выглядеть текст абзаца p с применением данного правила стиля в Internet Explorer 11: