Pencil2d скачать бесплатно
Содержание:
- Не только графика, но и рукописи
- Installing Dependencies
- New Versioning Scheme
- 5 Best Free 2D Animation Software of 2020 — Clideo
- Enhancements
- Onion skin
- Shortcuts
- Moho (Anime Studio) Pro
- I like Pencil2D but… it is a bit ‘buggy’, what can i do?
- Known Issues
- Help Improve Pencil2D
- Known issues & Gotchas
- ТОП-15 лучших программ для анимации
- Shape Tool and Library
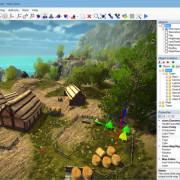
- The user interface
- I hear about “Nightly Builds” so what is it?
- Как пользоваться Pencil 2D
- New Features
- Дизайн и размеры
Не только графика, но и рукописи
Честно говоря, раньше Pencil был не очень нужен тем, кто не занимается графическим дизайном. С выходом iPadOS 14 стилус стал аксессуаром, который потенциально полезен каждому пользователю iPad.
Впервые у пользователей планшета появилась возможность совместить преимущества мобильного девайса и полноценного ПК. Функция Scribble позволяет писать от руки. Затем умная технология на основе искусственного интеллекта распознает рукописный текст и преобразует его в печатный. Самое приятное, что работает во всей операционной системе. Везде, где вы можете печатать, сможете и писать от руки. Все зависит от того, какой метод ввода вам привычнее. Мне уже давно ближе печатный.
На практике это означает, что набросанные от руки заметки превращаются в текст, по которому затем можно производить поиск. Текст можно выделять, копировать и вставлять. Написанные от руки адреса веб-страниц или электронной почты, а также номера телефонов становятся доступны для набора номеров и переходов по ссылкам. Удобно, хотя и повышает вероятность ошибки, связанной с некорректным распознаванием неразборчивого почерка.

Из аппаратных функций выделю возможность двойного тапа по плоскому краю для переключения инструментов или выключения девайса. Опцию можно настроить в зависимости от используемого приложения. По умолчанию в большинстве приложений она переключает на ластик. В том числе и в заметках. Ведь необходимости переходить к панели инструментов каждый раз, когда нужно подредактировать написанное больше нет. Как и поворачивать обратной стороной, что воспользоваться цифровым ластиком. Но знаю, что в этом вопросе нет единого мнения. Ряду пользователей больше нравился прежний дизайн, который делал стилус почти полным аналогом обычного карандаша с ластиком или ручки «пиши-стирай».
Назначение опции можно поменять в настройках или полностью отключить функцию, если мешает или не применяется.
Прослеживается явная аналогия с жестами AirPods. Появилась возможность поменять тип штриха в Notes двойным касанием. Удобно, но лишь в тех случаях, когда стилус целенаправленно используется для графического дизайна. Пользователям, у которых есть привычка в минуты размышлений вертеть карандаш в руках, лучше выключить опцию. Или включать только по мере необходимости.
Apple позиционирует Pencil прежде всего в качестве инструмента для художников. Но подходит и для любительского редактирования фотографий. Хотя приобретение столь недешевого аксессуара вряд ли оправданные расходы для тех, кому нужно изредка подредактировать фото для Инстаграма.
Самыми важными качествами Apple Pencil всегда считались его плавность и хороший отклик при использовании. В этом смысле ничего не поменялось, но я считаю это достоинством
Поскольку постоянно создаю и редактирую графический контент, знаю, насколько важно, чтобы стилус был чувствителен к давлению. Рисую им под различными углами, создаю текстуры и понимаю — в моих руках эффективный и точный инструмент для набросков, иллюстраций и заметок
Поскольку аксессуар достаточно дорог, не стану рекомендовать его всем и каждому. Специалистам творческих профессий он может оказаться очень полезен. Как и менеджерам, которым приходится много писать по работе и по разным причинам предпочитающим рукописный ввод.
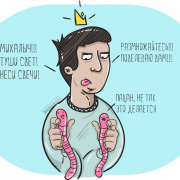
Наиболее интересен пользователям, которые рисуют и занимаются ретушью фотографий. Для этих задач мобильные версии графических редакторов не уступают настольным, чего не скажешь, когда необходимо создавать полноценные проекты. Здесь без ПК не обойтись. Впрочем, куда более разумный подход состоит в использовании тех инструментов, которые лучше решают конкретную задачу. Для создания контуров Pencil подходит лучше, чем мышь или трэкпад.
Предположу, что второй Pencil способен заменить ручку писателям, которые считают, что рукописи остаются рукописями в буквальном смысле даже в IT-эпоху.
Installing Dependencies
There are a few things that must be installed in order to build Pencil2D. In this section we will go over the installation of each of these components in detail. For Ubuntu we describe both graphical and command-line methods of installation, choose whichever one you feel more comfortable with (and if you don’t know the difference, choose graphical). For Arch Linux we describe only the command-line method since that is what most Arch users are used to.
Qt
Pencil2D relies on the Qt application framework so you must install it before you can successfully build the program.
Ubuntu
Graphical method
- Go to the Qt Downloads and download the Qt Online Installer for Linux.
- Executing this file will start the Qt installer application. If you can’t open it right away, you may have to right click on it and go to Properties, then in the Permissions tab select Allow executing file as program and then try opening it again.
- Click Next. It will give you the option to log in with your Qt developer account. You can skip this if you don’t have an account and do not want to register.
- Next specify a location for Qt, put it somewhere you can find it in case you ever need to navigate to the Qt files manually.
- Next you can select the components you wish to install. At the very least you should have Desktop GCC selected under the latest Qt version. Also make sure Qt Creator under the Tools section is being installed (at the time of writing there is no option to uncheck this, but it’s worth double checking!)
- Agree to the license and begin the installation. It will take a long time to download all of the files, so be patient. When the installation is complete, press Done and it will launch Qt Creator for you.
Command-line method
Pencil2D must be built with the Qt 5 framework. To install Qt 5, run this command:
sudo apt install qt5-default qt5-qmake libqt5xmlpatterns5-dev libqt5svg5-dev qtmultimedia5-dev
If you want to install Qt Creator (recommended), then also run the following command:
sudo apt install qtcreator
Arch Linux
Pencil uses version 5 of the Qt framework. To install all required components of Qt, run this command:
sudo pacman -S --needed qt5-multimedia qt5-svg qt5-xmlpatterns
For a more pleasant development experience, you might want to install Qt Creator as well (recommended). To do so, run the following command:
sudo pacman -S --needed qtcreator
Ubuntu
These are usually installed by default, so you don’t have to worry about them. If however you encounter issues, you can run the following commands.
- GNU Make and GCC:
sudo apt install make g++
- GNU Make and Clang:
sudo apt install make clang
Arch Linux
On most Arch systems, these are installed early on, but if your system does not have them yet, you can install them by running the following commands.
- GNU Make and GCC:
sudo pacman -S --needed make gcc
- GNU Make and Clang:
sudo pacman -S --needed make clang
New Versioning Scheme
So what is this new release schedule we mentioned in the introduction? Well basically, our team members got together in a meeting and identified multiple issues with the way that we are currently releasing new versions of Pencil2D.
Among these issue was the fact that some of the big changes or new features are introducing new bugs into our program. Since there is a long time between releases, these bugs don’t get fixed quickly and we are left with a lot of users complaining about the same issues.
We initially made release candidates, but they proved ineffective in finding bugs because nobody would use them. To address this, we will not be making release candidates anymore and will instead be releasing a bug fix version a relatively short time after each feature release so that we can quickly fix bugs resulting from big changes and distribute those fixes to our users in a timely manner.
This release, and all future releases ending in an even number will be bug fix releases. These releases will not introduce any new functionality, but we still strongly recommend you update so that you can avoid potential crashes and other issues.
All versions ending in an odd number will be feature releases. The next release, v0.6.5 will be one such release and is slated to have many new features including possibly a new undo/redo system, x-sheet support, new layer manipulation operations, and more. Because they require more work, the feature releases will take longer than the bug fix releases.
5 Best Free 2D Animation Software of 2020 — Clideo
clideo.com
Nima. There’re not many reviews on Nima but there should be, as it’s a truly amazing 2D animations software. It allows for mesh and bone animation to give your characters a more natural smooth look and flow.
Synfig. Synfig has more to offer to those who have a bit more 2D animation experience. Especially Linux users as it has a very handy audio editing feature that can be used through «JACK» integration.
Opentoonz. Opentoonz is an animation program that is not only free but also full-featured animation software package. This means that it offers some really powerful 2D animations including those of bones and mesh.
TupiTube. TupiTube is a free open source application, packed with useful features and developed by an open community Tupi. It’s also one of the easiest animation programs on the internet and is recommended for children from eight years and up.
Seen 135 times
Enhancements
- #1065 Fixed error message dialog typo (by Mattia Rizzolo).
- #1066 Implement individual division lines for the grid system (Preferences) (by David Lamhauge).
- #1086, #1087 Prevent layers with duplicate names
- #1091 Number postfix name suggestion when creating a new layer.
- #1100 Improved the quality of exporting an .avi video.
- #1102 Added cached frame pool size to preferences. (by Lucas Mongrain)
- #1108 Improved *.gpl import algorithm
- #1143 Remember last used FPS and camera sizes as default values when you create a new project.
- #1147 Move layers rather than swap when rearrange layers in Timeline. (by David Lamhauge)
- #1176 Make default palette file filter for suppored formats
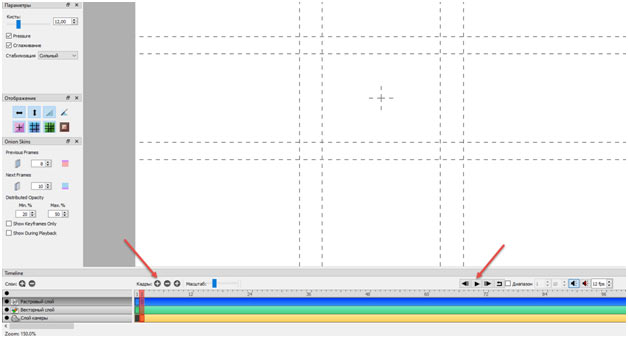
Onion skin
To help your animation process, you can turn onion skin on or off. Onion skin is the ability to see the previous and/or next keyframes. In the Preferences you can set the number of drawings to show and their transparency.
You can choose to have up to 60 keyframes shown as onion skin, but we recommend that you choose one or two drawings. The transparency is a matter of taste. Values between 15 % and 50 % seems to be a good choice.
In the Display Options dock, you can turn onion skin on and off. Here you can also set the color of the previous drawings to red, and the next drawings to blue. This color coding can be very helpful. Here is how a simple ball-animation looks like with red and blue onion skin.
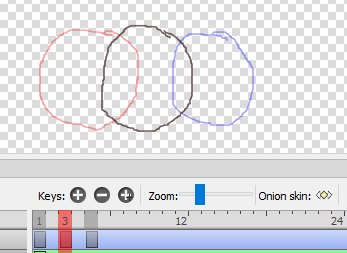
If you press this button on the timeline: the onion skin doesn’t show the previous and next keyframe, but the previous and next frame. In the following illustration you can see that this is no help.

Shortcuts
When you animate, you often need the same tasks done. That could be to change from the Pencil tool to the Eraser tool and back.
Most of the tasks in Pencil2D have shortcuts, and you can see the shortcuts in the menu or in the Preferences. Let’s look into the Preferences.
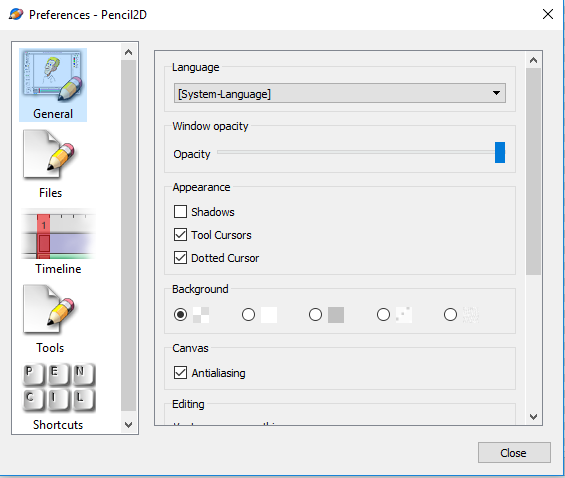
Press the Shortcut icon at the bottom, and you’ll see this list.

Moho (Anime Studio) Pro
Преимущества: его регулярно обновляют с расширенными и новейшими функциями для использования.
Против : не удобно для начинающих, так как функции немного продвинуты.
Anime Studio Pro — фантастический вариант для тех, кто хочет заняться созданием профессиональной 2D-анимации. Он доступен и разработан для анимации в стиле Flash. Хотя вы не можете создавать покадровую анимацию с помощью этой программы, тем не менее вы сможете создать несколько фантастических видеороликов.
Существует Anime Studio Debut — простая анимационная программа, предназначенная для начинающих пользователей и бесплатная загрузка. Но если вам нужны все возможности высококлассного программного обеспечения для 2D-анимации, вам стоит выбрать Pro версию.
Функции:
- Улучшенные инструменты рисования от руки
- Beizer позволяет вам создавать видео так, как вам нужно.
- Функция интеллектуального деформирования помогает создавать собственные сетки для изгибания и скручивания анимации.
- Реалистичное размытие движения
- Анимация для нескольких слоев одновременно
I like Pencil2D but… it is a bit ‘buggy’, what can i do?
We feel you, but every great piece of software you might know began in a humble way. Right now Pencil2D is in need of developers experienced or willing to learn Qt framework and C++ as well as proactive users that want to help however they can.
Pencil2D won’t get hot just by looking at it, in fact there’s more chances that you’ll hate it the more you look at it. We need YOU for miracles to happen! Consider donating your time to report bugs, create art or just hang out with us at the forum while we wait for the next release.
For more information on how to contribute to Pencil2D please visit the Contribute Page.
Known Issues
- Color Palette (Bitmap): First Swatch is unchangeable. Can’t use replace command. Use the other swatches to create your own colors or change it by editing the palette in a vector layer or via XML.
- Color Palette (Bitmap): Swatches will only update using the Replace command when having a vector layer active. (Note: Create your custom palettes with a vector layer selected)
- Selection Tool: Pressing / / , or changing application focus in your OS while having a selection active will ERASE the selection contents and in some rare instances will crash Pencil2D.
- Selection Tool (Rotation): Using the SELECT ALL command () and rotating a selection, will store the rotation transformation, if you press again and click with the MOVE TOOL on the selection, it will apply the stored value and rotate the selection again. Despite possible use cases this is a bug.
- Undo: Undoing a drawing modification made on an empty frame creates a keyframe on that frame.
- Undo: Undoing moving a keyframe to a new frame will create a blank keyframe on the place where it used to be.
- Undo, Smudge Tool (Bitmap): You cannot UNDO the smudge tool at the moment.
- Blur Tool (Bitmap): Pressing with smudge tool doesn’t work, do not use it. Use other drawing apps for smudge effects.
- Fill Tool (Vector): Filling a stroke requires the stroke to be selected.
- Fill Tool (Vector): “stroke thickness” option will reset pressure sensitive lines width.
Help Improve Pencil2D
In case you missed our announcement on social media, now you can upload your Pencil2D project on our website here to help Pencil2D development.
With a project library, our dev team will be able to test new features and detect bugs more effectively. We are still looking for more projects from our users so if you have any projects, please consider sharing them with us.
Even if you just share them privately, these files are invaluable to us. To those who have already shared your work with us, we are very grateful for your help. Some of the fixes in this very release would not have been possible without you.
Pencil2D is developed by passionate volunteers in their spare time. You can become one too, we have many other ways to help! Please visit the Contribute Page for further information.
Known issues & Gotchas
Here is a non-exhaustive list of bugs that we are already aware of, but were unable to fix in this release. Rest assured, we will do our best to fix all of them eventually.
- #1417 Panels spilling their content or timeline getting pushed outside the scree when the vertical screen size is too narrow, usually on 1366×768 laptops (this was partially addressed by #1369 already)
- #1426 Onion skins, layers & documents show “ghosted” (buffered) images after creating a selection
- #1427 Crash when importing the same layer multiple times with the new Pencil2D project layer import feature
- #1428 Crash when creating new file after using peg-bar alignment
- #1429 Undoing a stroke made in an empty frame, relative to an existing keyframe will create a new keyframe instead and mess up the undo order.
-
#1433 & #1435 Polyline tool drawing not updating properly while drawing on vector & bitmap layers respectively.
- Zooming out the camera layer to less than 25% will increase the chance of Crashing Pencil2D
- #748, #1004, #1098 Misc undo/redo issues. New Undo / Redo system under development will be reviewed for v0.7.0
- #1117 The CLI (Command-Line Interface) export operation consumes more memory than using the editor
- #1120 Undoing Selection Flip X / Y will delete the drawing instead. A possible fix will be available for the new undo system.
- #1133 Lag and buggy strokes with Huion tablets. Workaround: disabling the “linear optimizer” in your tablet driver may help if that option is available, see this post
- #1179 Currently there’s an audio delay of 1-2 frames for in-editor playback & exported files. However on some systems the opposite happens where the audio delay on playback might be longer by 12-16 or more frames, but on export it works ok.
- #1189 Zoom shortcut on drawing tools not working properly with the Middle Mouse Button (Win) and mouse input in general (All Operating Systems)
- #1193 The feather slider widget (Brush Tool) has a higher max value than the input value, and any value above 96 pixels will not allow you to paint.
- #1196 A unerasable stroke appears when drawing if you turn off the pressure sensitivity checkbox with drawing tools.
- #943 Color Palette (Bitmap): Some issues when replacing the first swatch remain. Only thumbnail changes color, but the actual color doesn’t. It is recommended you make a new item rather than changing it.
-
#1055 Color Palette (Bitmap): Swatches will not update using the Replace command. It only works when having a vector layer active. (Note: Create your custom palettes with a vector layer selected or import them from GIMP or Krita using *.gpl files)
- Undo: Undoing moving a keyframe to a new frame will create a blank keyframe on the place where it used to be.
- Undo, Smudge Tool (Bitmap): You cannot UNDO the smudge tool at the moment.
- Blur Tool (Bitmap): Pressing ALT with smudge tool doesn’t work, do NOT use it. Use other drawing apps for smudge or blur effects for now.
- Fill Tool (Vector): Filling a stroke requires the stroke to be selected.
- Fill Tool (Vector): “Stroke thickness” option will reset pressure sensitive lines width.
- Vector Engine is a WIP and does not work as intended. Much more work will be required, please avoid using it for production.
ТОП-15 лучших программ для анимации
Программы для создания анимации превращают бездушное изображение или набор картинок в связную историю. Это благотворно сказывается на вовлечении аудитории. Ведь, если честно, мультики любят все, и дети и взрослые. Но чтобы освоить профессиональный софт уровня AfterEffects или Maya, понадобится талант художника и 10 лет обучения.
Не спешите отчаиваться! Мы в этой игре больше 10 лет и точно знаем, чтобы “собрать недорогой короткий ролик”, “анимировать баннер или кнопку”, не обязательно посвящать анимации полжизни. Достаточно выбрать подходящий софт. А может, вы даже откроете в себе талант серьезного моушн-дизайнера?
Итак, несложные коммерческие или личные задачи по анимации решаются с помощью:
| Софт | Русский язык | Лицензия | Стоимость |
| Stop Motion Studio | Нет | Пробная | От 125 руб. |
| Cartoon Animator 4 | Нет | Пробная | От 6300 руб. |
| Moho Anime Studio Debut | Нет | Пробная | От 6300 руб. |
| DigiCel FlipBook | Нет | Пробная | От 1300 руб. |
| Toon Boom Harmony | Да | Пробная | От 2800 руб. |
| Adobe Animate | Да | Пробная | От 1350 руб. |
| Blender | Нет | Бесплатная | Бесплатная |
| Pencil2D | Нет | Бесплатная | Бесплатная |
| Wideo | Нет | Пробная | От 1300 руб. |
| Easy GIF animator | Да | Пробная | От 1800 руб. |
| Synfig Studio | Да | Бесплатная | Бесплатная |
| Animaker | Да | Пробная | От 1300 руб. |
| Explaindio | Да | Пробная | От 2300 руб. |
| Pivot Stickfigure Animator | Да | Бесплатная | Бесплатная |
| CrazyTalk | Да | Пробная | От 3800 руб. |
Shape Tool and Library
Difficulty: Easy
Project Core Objective: Add a tool which allows users to easily place a variety of shapes
Description:
A new tool should be added which allows you to select a shape from a library (or
some other way of selecting from many different shape options), and then draw
that shape on the canvas instantly with the desired scale and rotation simply
by clicking and dragging with the tool. Many of our users use Pencil2D for
animation with simple shapes, and even advanced users will use basic shapes as
a base for more complex figures. This shape library can greatly improve the
quality of the artwork and the speed to make it for these users.
Implementing this feature will require adding support for the tool on both
bitmap and vector layers. The library should include the following shpaes (but
is not limited to only these shapes): rectangles, circles, squares, n-gons, and
stars.
- Proposal Tag:
- Skills required: C++, experience with vector graphics (very useful)
- Co-Mentors: Matt Chang (chchwy), Connor Deptuck (scribblemaniac)
The user interface
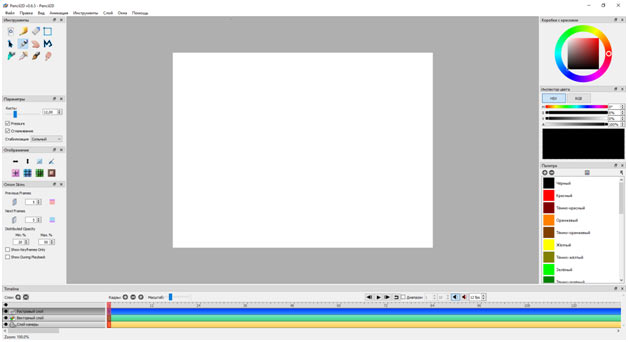
Before we go to animation, let’s have a quick glance at the user interface.
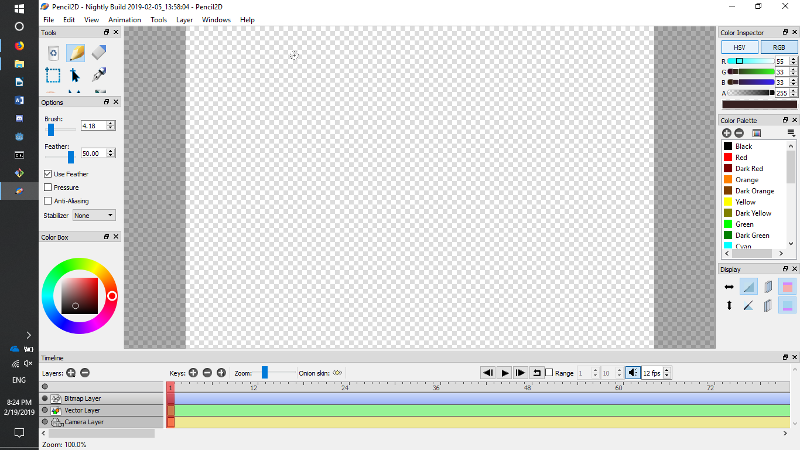
In the top you have the menu bar. Here you can load and save files, import images, add layers and much more.
In the bottom you’ll find the time-line, that keeps track of your key-frames.
To the left and right you’ll find dockable windows, where you can select tools, colors, choose settings and more.
In the middle you have the canvas. The canvas is unlimited in size. The white rectangle in the middle of the canvas, is the camera field. When you open Pencil2D the first time, this size will be 800×600 pixels, but you can change it by double-clicking on the camera layer. Remember that the bigger camera field you choose, the more RAM and computer power you use and need.
I hear about “Nightly Builds” so what is it?
Nightly Builds are the most up-to-date, experimental versions that reflects the current state of the pencil2D application development. In Nightly builds you will have the latest features and bug fixes if you like to try something new. But you have to understand the nightly builds are not final versions and sometimes they can break more easily.
However, we encourage you to try the latest Nightly Builds whenever you encounter an issue with current pencil2d version, to see if the problem has already been fixed. That can help our dev team to avoid unnecessary or duplicate bug reports.
Nightly Builds
Как пользоваться Pencil 2D
Рабочий процесс в редакторе каждый раз начинается с подготовки нового холста через меню «Файл» в левом верхнем углу.

Задать параметры для подготовленной области нельзя, но проблем с добавлением деталей не возникнет: с помощью масштабирования легко раздвигаются границы и появляется новое место для рисования. Если же необходимо вернуться к уже подготовленным ранее проектам, то поможет кнопка «Последние документы», а вот через «Открыть» добавляются материалы с жестких дисков: иллюстрации и изображения, требующие доработки.
Как действовать дальше – зависит от желаемого результата, поставленных требований и мастерства.
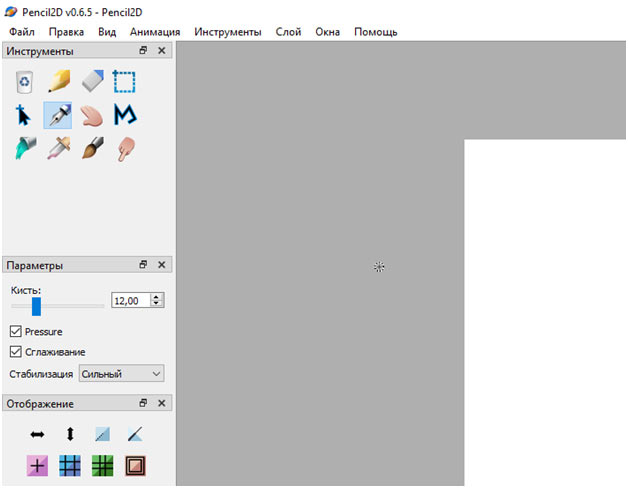
Художники предпочитают начинать с выбора подходящих инструментов: кисти, карандаша или элемента, добавляющего на холст геометрические фигуры, блоки и линии.
Дальше важно разобраться с параметрами: например, если выбрана кисть, то появится возможность сменить толщину добавляемых линий, активировать распознавание силы нажатия и сглаживания, а также – выбрать уровень стабилизации
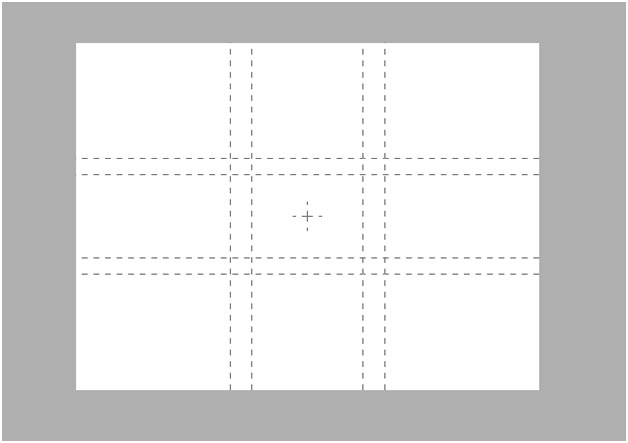
Чуть ниже располагается пункт меню «Отображение». Там припасена целая коллекция направляющих линий и специальных всплывающих элементов, облегчающих кадрирование, выбор подходящего места для подготовки рисунков или экспериментов. Раздел частично посвящен новичкам, но пригодится и профессионалам, которым не помешают дополнительные подробности.
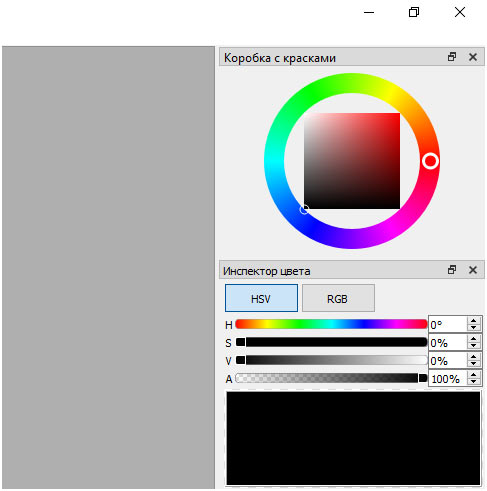
Следующий шаг – переход к палитре. Оттуда выбираются и настраиваются цвета и оттенки, регулируется эффект прозрачности, вызывается инспектор для калибровки оформления всего кадра целиком. При необходимости из «Инструментов» разработчики предлагают воспользоваться «Пипеткой» и за считанные минуты оценить оформление графического элементами.
После экспериментов над вкладками слева и справа пора переходить к Timeline – временной шкале, куда и добавляются новые кадры, и откуда генерируется анимированное изображение. Взаимодействовать с системой необычайно легко: сначала выбирается слой (растровый, векторный или с камеры, куда импортированы материалы), а после – уже на холсте – вырисовываются новые элементы.
Если контент подготовлен, необходимо нажать на плюсик слева, а дальше – перейти уже к новому кадру (если прошлые действия необходимо оставить, то нужен правый плюсик). Парочка экспериментов и вот панель уже заполнилась отдельными фрагментами, которые воспроизводятся по кнопке Play на той же панели быстрого доступа.

Выгружаются подготовленные материалы – изображения и видеоролики – через панель «Файл», расположенную сверху. Там предусмотрен пункт «Экспорт». Вариантов предусмотрено несколько: ролик, последовательность изображений, отдельный кадр, анимированный GIF. Какой формат выбрать – зависит от нужного результата. Ролик разбавляется музыкой, фрагменты помогут пересобрать материал заново, а GIF – уже готовый материал, с легкостью выгружаемый в социальные сети.
Установка
Редактор распространяется не в виде стандартного дистрибутива, который распаковывается через инсталлятор в выбранный каталог, а в формате Portable-сборки, запускаемой через исполняемый exe-файл. Дополнительные действия не понадобятся – Pencil2D сразу станет доступен для взаимодействия и творческих экспериментов. Не возникнет проблем и с локализацией: язык перевода подбирается автоматически в зависимости от параметров операционной системы.
Интерфейс и настройки
Оформление у Pencil2D характерное для жанра: сверху доступна горизонтально вытянутая панель быстрого доступа, откуда добавляются новые слои, правятся текущие кадры, вызывается меню для общения с технической поддержкой.
Слева располагается ряд блоков с инструментами, параметрами выбранного в текущий момент элемента (кисти, карандаша или заливки), отображением меню предпросмотра и разделом с настройкой времени отображения кадров, прозрачностью. Снизу – специальное информационное меню, разделенное на слои с растровыми или векторными изображениями (или нарисованными от руки иллюстрациями) и материалами, перенесенными в меню анимирования. Там же доступны кнопки для предпросмотра и настройки масштаба.
Справа – традиционная палитра с пипеткой, инспектор цвета форматов HSV и RGB, коробка с красками, необходимая для переноса визуальных прессетов на виртуальный холст.
New Features
- #1068 Added support for TIFF format (by Andrey Nevdokimof).
- #1074, #1121 Added a slider for changing frame size at timeline (by David Lamhauge).
- #1109 Import images as new layers on specific frames based on filename and numbering postfix e.g., Joe0001.png’, ‘Joe0002.png’, etc (by David Lamhauge).
- #1115 Added support for transparency in exporting WebM and APNG.
- #1126 Check for Pencil2D updates. (+ Added forum/discord links in Help menu.)
- #1136 Added an option to export key frames only when exporting image sequence.
- #1145 Added zoom shortcuts from 25% up to 400% as 1, 2, 3, 4 and Shift+2, 3, 4. (by David Lamhauge)
Дизайн и размеры
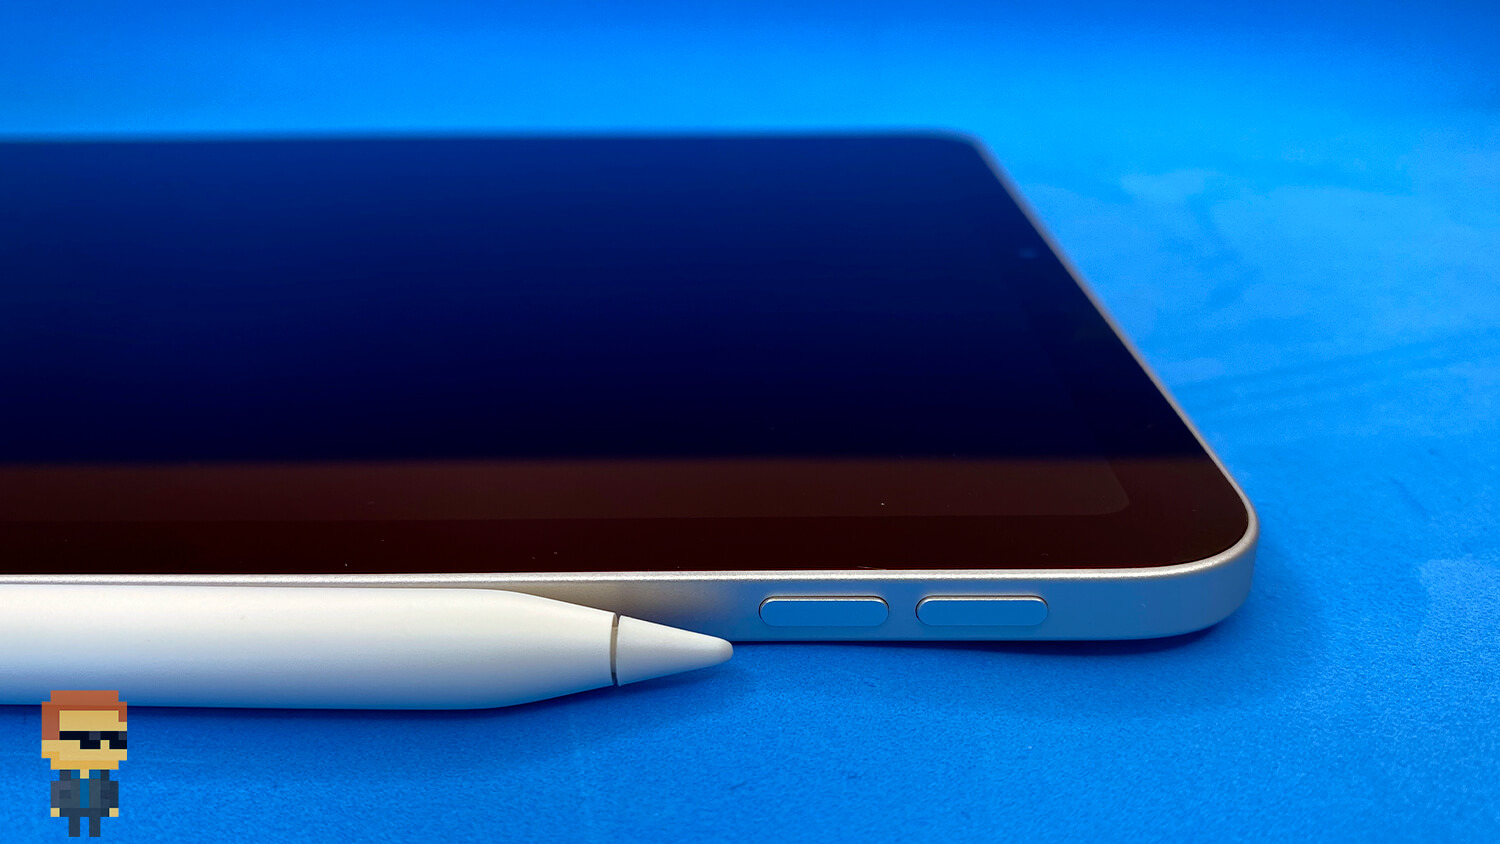
 Это Apple Pencil 1. С колпачком и Lightning-портом.
Первая версия, полностью оправдывая своё название, в своём минималистичном дизайне похожа на обыкновенный карандаш. Магнитный колпачок, ограниченный металлическим кольцом, издалека напоминает привычную стирательную резинку.
 Это Apple Pencil 2. Никаких колпачков – только магниты.
Корпус второго поколения карандаша получил грань, благодаря которой отдалённо напоминает фирменную ручку Bic. Выглядит интереснее, а главное эргономика Apple Pencil 2 выше, грань удобно фиксирует палец при письме или рисовании.
Кроме того, пластик устройства матовый, оно надёжно лежит в руке и не скользит. У первого поколения он глянцевый, что не добавляет баллов в плане удобства пользования.
Наконец, грань на Apple Pencil 2 позволяет зафиксировать его на ровной горизонтальной поверхности, первое поколение всячески пытается укатиться.

Название у первого карандаша название обозначено на металлическом кольце. У второго поколения надпись выполнена прямо на боковой грани. Больше никаких дополнительных элементов на корпусе. Зато при заказе на американской версии официального сайта можно запросить гравировку своего имени. Причём бесплатно.

Что касаемо размеров, тут ситуация практически не изменилась. Длина карандаша первого поколения – 175,7 мм, второго – 166 мм. Диаметр устройств одинаковый – 8,9 мм.